I just realized through all of these updates, everything has pretty much been prep, surface prep, corrections made to the kits. It feels like I've been drilling non-stop it seems on various parts. Let's get on with the build!
BRATTAIN - REAR BULKHEAD
This section of the model, I've been debating which method I should use to create the shuttle bay lighting as seen on the filming miniature:
 |
| USS BRATTAIN - STTNG 'Night Terrors' |
 |
| unnamed Miranda Class - ST:IV - The Voyage Home |
 |
| USS RELIANT - ST:II - The Wrath of Khan |
 |
| USS LANTREE - STTNG - 'Unnatural Selection' |
I tried to first build the shuttle bay from the PE set. I lost one shuttle bay and the second one broke apart when I tried to use CA to glue it together. So now I have 2 options: Do nothing and leave it as is, or cutout the shuttle bays and use the plugs I previously casted to pour up clear resin bay doors.
My option is - DO NOTHING
I really don't like the idea of cutting this part out with an untested (by me) method of creating the fabulous lighting around the shuttle bays. Instead, I'm going to use a few fibre optics around the doors to create this effect. The first thing I did was to light block the inside with grey primer.

I then masked off everything but the doors and built up primer (grey then white) and Tamiya Pearl White as a finish coat on the doors.

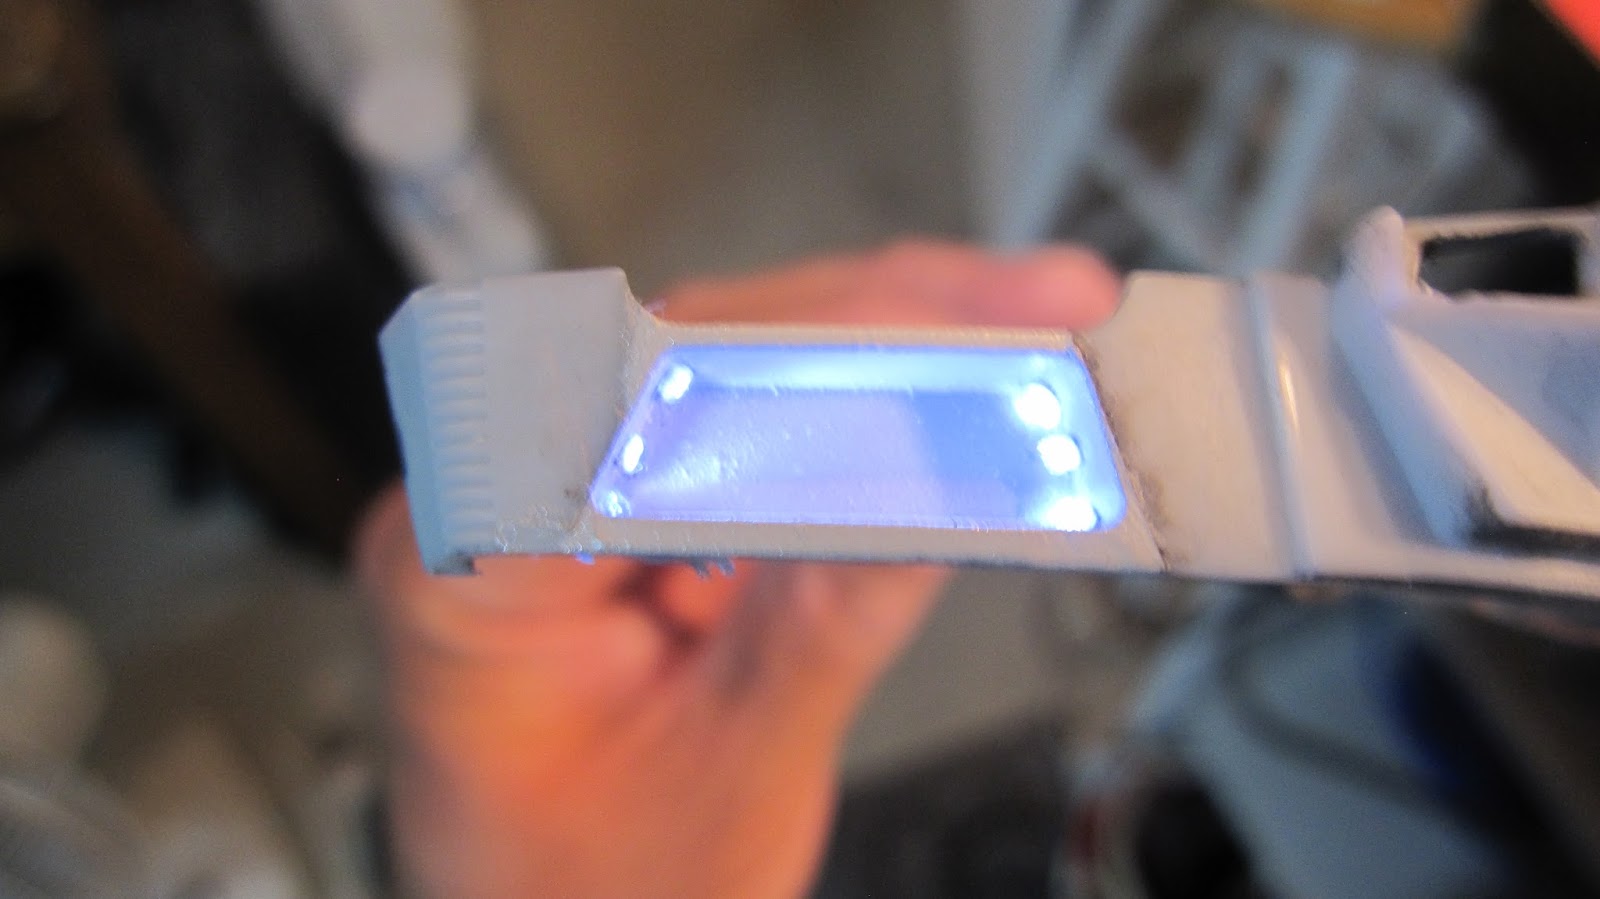
I drilled out six holes in each door alcove.


I 'bloomed' each fibre optic strand with a lighter to create a lens
I use 'pig tail' elastics to group the fibre optic strands.


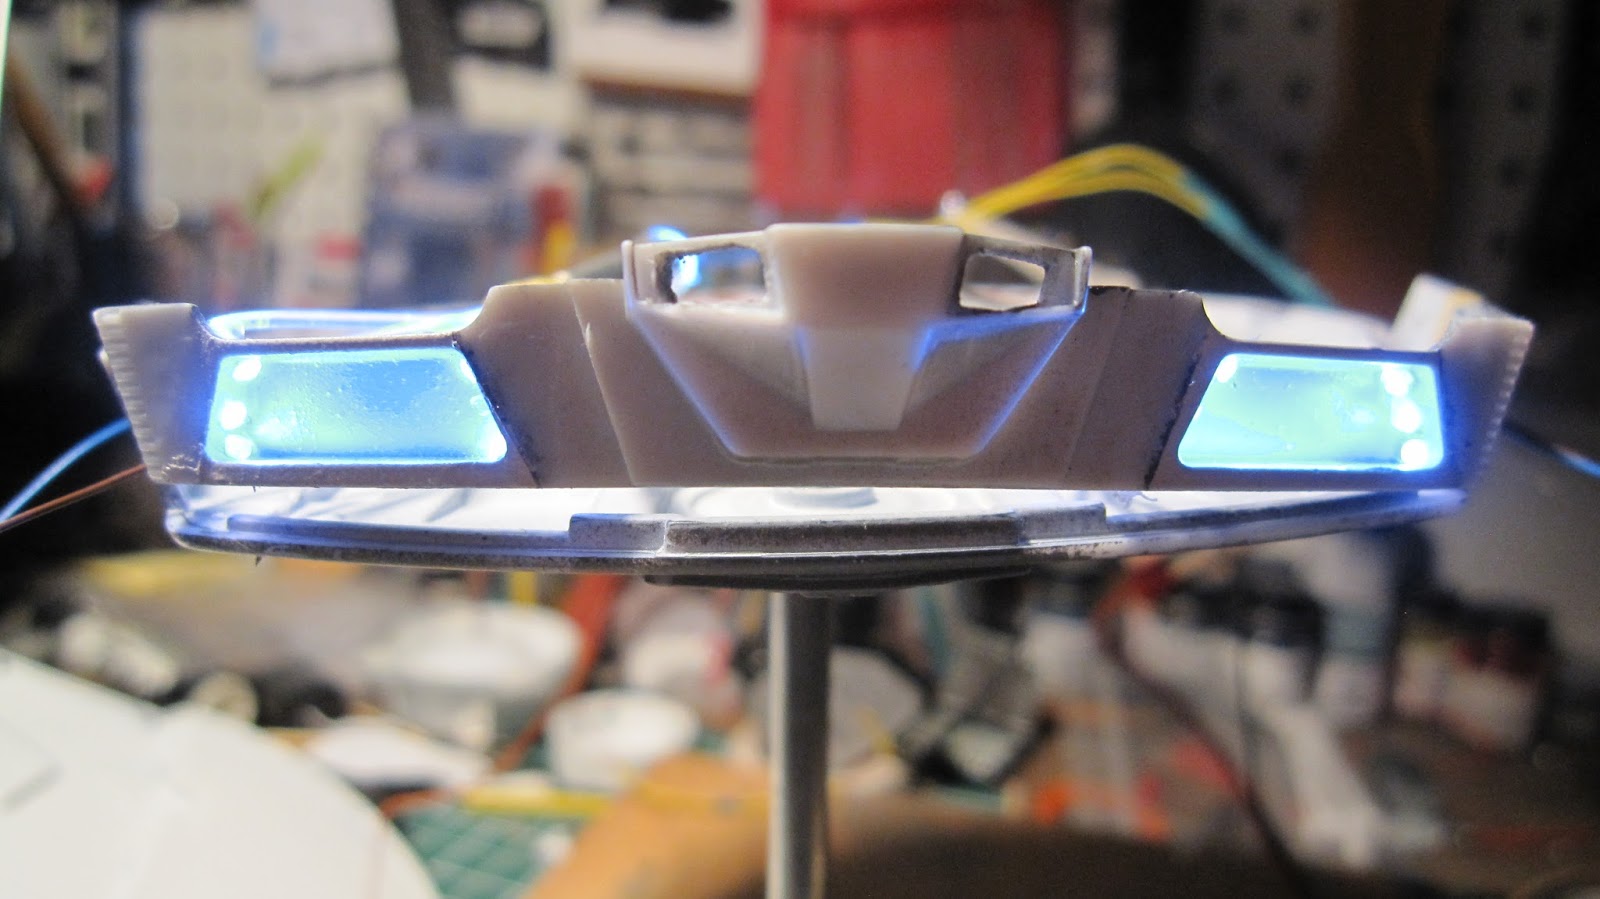
Just holding it up to a light, I could see the desired affect happening.


A test with an LED instead.

To finalize the fibre optic strands, I put heat shrink over the collected strands and then a piece of 1/4" aluminum receiver, which fits a 5mm LED. I decided to go with cool white as it gives a bluish look.


Now for the impulse engines...
I used 1.8 mm red LEDs. I found these very fragile to work with. I had to use a low-temp setting on the soldering iron to attach the wires. I went through way too many LEDs though learning the heat destroys them.


When the model is finished, there are clear lenses which I will frost to go over the red LEDs and a louvers/grills to go over top of that.
The most nerve-wracking thing to do is to cut up a perfectly good model to make improvements. I started off with the upper saucer B/C deck.
The replacement part installs from underneath and is slightly larger than the B/C deck. I decided the best way to remove the part was to score the back side where the B/C deck meets the saucer and the part removed away smoothly.


With some sanding, filing, etc. the replacement parts fit perfectly with the existing piece.


And now for the neck (inter-connecting dorsal)...
I reserved both halves of the torpedo bay for future kit-bashing. The remaining photos are just to illustrate how much has been removed from the model.


I thoroughly washed all the new parts with warm water and dish detergent. The first thing to address with the B/C deck is the fact there is a light source coming from the bridge which is supposed to be lighting for the registry. I used a liquid mask to fill in those spots.

Next, mask off the windows, especially the 'officers lounge' windows.

I sprayed the whole part with a couple of thin coats of white primer to promote light distribution.

The windows were masked with a template which came with part, you had to cut out. For the circular holes, I will use a drill to drill though the paint.

As I previously mentioned, these 1.8 mm LEDs were so fragile, I attempted to light this many times.


Although it looked stable, it broke too, the leads from the LED. In the end, I ended up tacking the 2 LEDs together with a minimal amount of solder.


Then I light-blocked the clear piece from the back with grey Rustoleum primer. It also helps me find the part on my messy work bench.


Not much has been done with this other than giving it it's first white primer coat.


That will be a wrap for this entry, a new one will follow soon...
Happy model building!!

I then masked off everything but the doors and built up primer (grey then white) and Tamiya Pearl White as a finish coat on the doors.

I drilled out six holes in each door alcove.


I 'bloomed' each fibre optic strand with a lighter to create a lens
I use 'pig tail' elastics to group the fibre optic strands.


Just holding it up to a light, I could see the desired affect happening.


A test with an LED instead.
To finalize the fibre optic strands, I put heat shrink over the collected strands and then a piece of 1/4" aluminum receiver, which fits a 5mm LED. I decided to go with cool white as it gives a bluish look.

Now for the impulse engines...
I used 1.8 mm red LEDs. I found these very fragile to work with. I had to use a low-temp setting on the soldering iron to attach the wires. I went through way too many LEDs though learning the heat destroys them.


When the model is finished, there are clear lenses which I will frost to go over the red LEDs and a louvers/grills to go over top of that.
ENTERPRISE-A - REPLACEMENT PARTS
The most nerve-wracking thing to do is to cut up a perfectly good model to make improvements. I started off with the upper saucer B/C deck.
 |
| B/C DECK CUTOUT TEMPLATE |

 |
| I could see this be used as a kit-bashing part in the future. |
 |
| I find it so odd to see the Refit saucer without it's 'peak'. (Also the phaser banks have been removed as well as they were inaccurate.) This reminds me of early shots of the studio model being built. |
Next to remove is the area around the impulse deck...

 |
| a very 'naked' upper saucer |
With some sanding, filing, etc. the replacement parts fit perfectly with the existing piece.


 |
| good light distribution |
 |
| the replacement piece is a new torpedo bay |


 |
| I took this picture as a 'What if?' - a refit without the Torpedo deck. |
B/C DECK
I thoroughly washed all the new parts with warm water and dish detergent. The first thing to address with the B/C deck is the fact there is a light source coming from the bridge which is supposed to be lighting for the registry. I used a liquid mask to fill in those spots.

Next, mask off the windows, especially the 'officers lounge' windows.

I sprayed the whole part with a couple of thin coats of white primer to promote light distribution.

The windows were masked with a template which came with part, you had to cut out. For the circular holes, I will use a drill to drill though the paint.

IMPULSE ENGINE - ENTERPRISE-A
As I previously mentioned, these 1.8 mm LEDs were so fragile, I attempted to light this many times.


Although it looked stable, it broke too, the leads from the LED. In the end, I ended up tacking the 2 LEDs together with a minimal amount of solder.


Then I light-blocked the clear piece from the back with grey Rustoleum primer. It also helps me find the part on my messy work bench.


 |
| Once I place the light behind the impulse crystal, I will light block the whole thing with primer, followed by duck egg blue. I will use a mask for the circle and carve out the spaces between the spokes. |

TORPEDO BAY
Not much has been done with this other than giving it it's first white primer coat.


That will be a wrap for this entry, a new one will follow soon...
Happy model building!!