Well this one has been a long time coming...After having bought my original kit in 2005, and repurchasing it in 2015 (I lost some parts over the years), I finally feel comfortable to build this grand lady...as a gift.
This is the LARGEST model I will have ever built to date. Everything about this kit is BIG!
When you open the box to this model, it is packed!! To me, size wise, this is what the original AMT Refit looked like as a kid, except there was only 33 pieces, and horribly inaccurate, vs. this kit which is beautifully accurate (90% there, there are some things wrong with it, which I will attempt to fix in the build).
Usually the average model has about 2-3 bags plus a sealed decal sheet, not this model!
 |
| 11 bags + decals! |
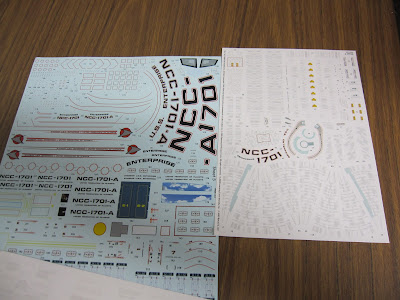
4 sheets of wallpaper aztec decals (15 inches x 15 inches) and a 5th sheet (same as original Polar Lights release) of marking decals.
A comparison between the 1/350 decals and 1/1000 decals
With a kit this large and having as many clear parts as it does, it was designed with lighting in mind. Which is what I will be doing.
A MOCK-UP
 |
| 1/1000 scale Enterprise A on the left vs. 1/350 Excalibur centred |
I will say there are 2 really good builds I've seen on YouTube by professional model builders of this kit: Simon Mercs of the Kit Factory and Boyd of TrekWorks. I won't pretend to equate my work to their level of building, but this is my first full attempt to build this kit. If you do get a chance, check out their builds.
For my build, I'm starting with the saucer, then moving onto the neck, the pylons, the secondary hull assembly with pylons, nacelles, the deflector dish and lastly the base. Every Star Trek model, particularly the ones that have the 'Enterprise shape': Saucer/neck/engineering body/nacelle configuration defies gravity and often the Centre of Gravity (CG) is different from the model kit's mounting point. The Enterprise-D has a CG point outside of the model, or is on the top of the saucer. The lightweight 1/1000 scale models are easiest starting with the engineering section and then adding on. For this scale, the saucer is the heaviest piece, and it can be stored and protected in the original box. The neck on this kit requires additional putty work where it meets the Impulse Engine and the taper on the back where it meets the engineering hull plus the connection at the deflector dish (same as on it's 1/1000 little cousin). I digress let's build this model!!! :D
STEP 1 -
Separate the parts for my first sub-assembly, The Primary Hull (aka the Saucer Section) and paint them.
I started with cutting off the tree all of the clear parts for the saucer, masking each part on a flat surface so I can light-block the ribs or other parts which need to remain opaque.
For the back wall of the bridge, I used an Aztek Dummy window masks for the 1/350 TOS Enterprise and cut the mask in half for the little half windows on the Bridge.
For the Officer's Lounge windows, I used Yellow Frog Tape - on previous builds, I've had very bad issues with Tamiya Tape, it could have just been a lot# issue, but I have lots of this tape and it does leave a crisp line.
For the impulse crystal, I used Frog Tape for the centre, and Elmer's white glue on a toothpick to mask of the individual segments.
Here's my first coat on the the clear parts for the saucer.
These parts are for the 'planetary sensor and navigational dome', which is the new addition to the Refit Enterprise.
I've shown this in the Brattain Enterprise-A build, but I always start by washing the parts to remove the mould release on the parts with dish detergent and warm water. I don't need to show this again but that was 'step 2' with the saucer parts. followed by priming the parts.
The goal of the saucer sections is to start from the centre, which are the high points on the upper and lower saucer and work outwards towards the edge.
BRIDGE, B/C DECK
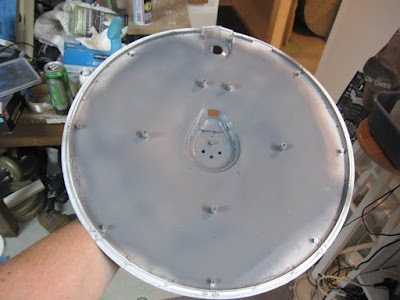
The first thing I did with the saucer was 'hog out' the material so I can add lights from underneath. I must say, this is really thick plastic. I used a dremel tool to do this and cleaned up the opening later with an Olfa box cutter.
Next, I trimmed off the oversized alignment pins for the
Next, I glued the back panel to the Bridge/Deck A structure. The tricky part is for the area above the airlock door to be flush with the back of the bridge and the trapezoid structures on either side protrude. In reality, those structures are add ons on the physical 8' studio model.
Here is the bridge mocked up with the upper saucer. There is a noticeable gap between the two parts.
I then primed the back of the bridge white, so I then could mask off the interior of the trapezoid structures.
Here is the bridge finally mounted to the upper saucr/B/C Deck. I use styrene plastic to fill the gap.
Here is the front view. I added two extra portholes to give it a TOS look but also the original Richard Taylor Enterprise-Refit.
 |
| Richard Taylor/Andrew Probert Early USS Enterprise from Star Trek The Motion Picture |
LOWER PLANETARY SENSOR ARRAY
The lower dome on the sensor platform has 2 too many rings. So to eliminate them, I masked off each area and used 'red putty' (aka glazing spot putty by Bondo/3M)
With a part this size, it is easier to paint it on its own vs. painting it attached to the bottom of the saucer section. Also, the base colour is a pale light grey vs. pearl white the rest of the ship is basically.
Here is a comparison of various 'Planetary Sensors' in order of release. Despite it's size, the one on the right is the most accurate, with this one, the Polar Lights version as a close 2nd. The worst one is the one on the left which is from the old AMT/ERTL 1/537 USS Enterprise kit which was released over 35 years ago. For kit bashing however, it has potential.
IMPULSE ENGINE
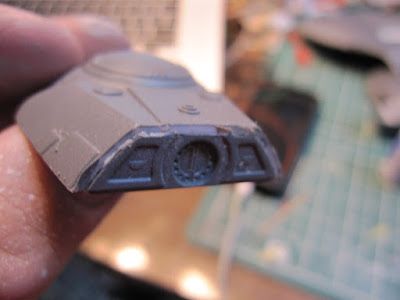
I remember when I originally bought this kit in 2005, I was really disappointed with this part. It's just wrong! This is the real one on the studio model:
This is the kit part in process of being corrected. In reflection, the centre post should be thinned out too but this is acceptable and closer to it than doing nothing.
I used styrene pieces to create a new nozzle edge, and 15 minute two-part epoxy as a glue. I've filled in the centre post with red putty. I will make a custom decal to recreate the design there.
Behind each lens, I used an X-Acto knife to scrape the lens to frost them.
SAUCER OUTER WALLS
What is unique to this model is the saucer's walls are moulded as separate pieces, and I believe this is due to the gridlines and windows openings.
My first step with these piece was to fill in around where the Impulse Engine connects as it appears on the studio model. A very small but noticeable detail.
After priming them grey, then white, I then masked off the grid....
...leaving the spaces between to be painted the hull colour which is Tamiya Pearl White.
For the windows, the kit has inserts which get inserted from behind.
This will wrap up this entry for this build.
Happy Model Building!!
DISCLAIMER
All materials posted on this blog are for educational purposes only. This blog makes no profit for its efforts. This blog claims no copyright to any materials linked or posted from the world wide web. Any posted pictures are for educational reference.


No comments:
Post a Comment