The engines and cockpit/nose section were very simple to attach. First thing was to solder the wire and use heat shrink to insulate it.
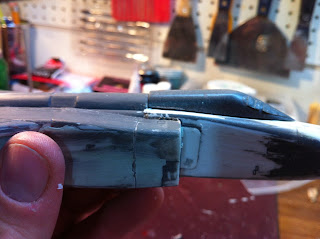
Before I moved on to what I thought was going to be simple, the air intakes on either side of the cockpit, I had to deal with seaming some really bad gaps. Evercoat makes it sooo easy!
So now onto those intakes...
I was a bit puzzled by the fit (again) and decided to move onto the canopy for the cockpit.
Same $%&^ fit issues!! So I went to Google to find detailed pictures of these areas and soon realized I was going to need to significantly modify these parts to make the plane accurate,
First thing I noticed was the notched section of the spine is actually a vent with only a dorsal slit and flight aluminum overhang.
I filled the spine with bits of styrene to make the height and used evercoat to gap the height difference. Also a fresh coat of primer to see any other defects. I will be putting a very fine sheet of styrene to create the overhang.
Now the air intakes. First off the part is hollow and it shouldn't be so I filled it. Secondly the intake narrows in a vertical direction from the bottom so I used evercoat to fill that.
The second detail missing is a vent that sticks out of the bottom facing aft from each intake. So a trip to the hobby store for some Evergreen square tubing simplified me trying to build a micro box.
So now Final Assembly!!! So all I have left to do before painting is some seaming around the newly added parts, sanding, sanding, and, wet sanding.
Stay tuned!!! I have a few other models starting up while I finish the arrow so I will be posting them as well as my first 'big build' in years, an AMT USS Enterprise NCC-1701-D from Star Trek Generations...
Happy Modelling!!


No comments:
Post a Comment