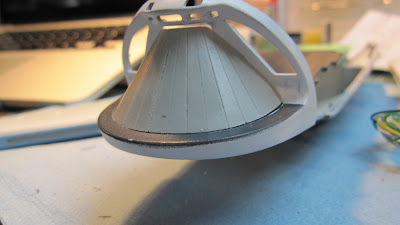
I was going to start this update on the neck, but there is still much work to be done on finishing the saucer still. This update will go over the internal sections of the Secondary Hull: The Botanical Gardens and The Shuttle/Cargo Bay.
This model has extensive internal parts, something which really makes this model shine as a model kit. The saucer has the VIP lounge, behind the bridge. The Secondary Hull has a shuttlebay/cargo bay which seems to run the length of Secondary Hull. The Botanical Gardens (Arboretum) is at the lower end of the Secondary Hull, represented by 12 large windows, 6 on each side.
 |
| All of the internal parts on one sprue tree |
BOTANICAL GARDENS
This large space on the fictional starship is located on Deck 20 or T Deck, depending upon your nomenclature. I hand painted it using several enamel paints and clear blue over silver for the water.
 |
| finished in 2005! |
I am pleased with the results, even 11 years onwards. I also added panel detail which was absent. The original part didn't have any doors or hallways marked on either fore or aft wall.
Each tree was dry brushed with varying shades of green to simulate foliage.
On to the ceiling...
It's a very detailed part but my biggest issue with it is you only see sky on the edges.
Finished kit part.
I've made my own ceiling using clear styrene and decaled it with a picture of sky I've taken.
I figure in the 23rd century, they could make a featureless ceiling, projecting sky. The studio model seems too suggest this.
 |
| from Star Trek The Motion Picture |
SHUTTLEBAY/CARGO DECK
Man, this is a BIG part of the ship. In fact most of the Secondary Hull is hollow, unlike the original Constitution Class starship (or the Enterprise-A which had a small shuttle bay - I digress).
 |
| from Star Trek The Motion Picture |
 |
| From Star Trek The Motion Picture - Kirk's POV |
Fast forward to 2016...
Most of these parts are usable as is.
 |
| fore wall, ceiling and one of two turbo shafts |
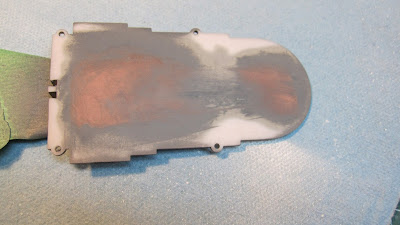
The Flight deck though was hand painted and looked uneven. I've sanded down the original decal and am attempting to make it smooth again.
Here is the flight deck in relation to the secondary hull.
Final painting...
On the fantail of the secondary hull, it gets painted the same colour as the flight deck.
Here is the fantail/door frame sitting on the flight deck.
Unfortunately I've missed place both the kit shuttle bay door, but I do have the Don Light's and Magic replacement door. It fits beautifully in place and easily removable as well as kit accurate.
The walls of the flight deck (actually all the parts) were hand painted. It's 2016, I can do better. I've roughed up and sanded just the flight deck area and am in the process of drilling out the observation windows. This will add extra light into the space and make it look consistent with the exterior by having glowing windows.
Magic Tape by Scotch isn't only good for taping down receipts in expense reports, but makes for great diffusion as well!
ASSEMBLY
Since I sanded down the the original decal, I cleaned up, painted the flight deck, added a gloss coat and when I went to use the new kit decals, I realized the decal is transparent - in other words the yellow stripes are barely visible and they tore up. So I made my own from an earlier scan I made of the decal sheet.
TIP: Scan the decal sheets. If you mess one up, you can always print a new one on decal film, which you can buy at your local hobby store.
At the fore end of the cargo deck/shuttlebay are two turbo-lift tubes. I decided to install them as is vs. repainting them. They will glow brightly from a distance.
Along the sidewalls, I noticed that on the bulkhead there seems to be a port of light between the ribs, so I drilled out the marks for them and installed fiber optic in each one.
Because of all of the paint over the years, I was concerned about the fit of the parts. I used heavy duty clamps to clamp the walls to the floor, and ceiling to the walls.
Once the structure was in place, I hot-glued two cool white LEDs to shine light through the turbo lift chambers exposed. What does become apparent is the scale of the turbo lifts in the matte painting above is way off to accommodate a real elevator shaft. That's okay. This happens often in film production.
Although my shuttle bay is not quite perfect, it pleases me to see an old part, reworked into a new model.
For the light leaks, I used Duct Tape (the aluminum kind which is actually used for ductwork vs. the cloth kind).
Here is the shuttle bay/cargo bay sitting inside the secondary hull.
Since I have added extra windows, I know there is a need to add extra baffles internally to bounce light off of. I used white cloth tape, the same kind you use in film and television.
Here is the shuttle bay complete with white cloth tape, ready to be installed.
This wraps up this entry. Next one will continue onto the secondary hull. There is still much work yet to be done on the saucer.
Happy Model Building!!


No comments:
Post a Comment