This entry will cover the remaining decals to be applied to the saucer of USS Olympia. This is where I was at in my last entry.
What happened previously was a tear in one of the pie-shaped aztec decals that radiate from the centre of the saucer to the rim. You can see I put down every other pie-shaped wedge, then go back and fill in the rest.
My solution to the torn decal was this:
Once I found the pie slice I needed, I sprayed it with Decal Bonder to prevent tearing.
I alternated the decal and subdivided it to randomly blend into the hull, in case the dye in it doesn't match what has been laid down before. When you put the decals down, they are so fine in colour its very hard to tell where the pattern is. I wear prescription glasses and even with that it is very hard to tell.
The decals dry darker. When they are first applied its hard to tell where the lines are.
Then I moved on to putting all of the pinstripes around the phaser banks. I cut the centre so the decal can easily got around the protrusions.
And finally the pinstripes around the RCS thrusters.
There are 7 basic shapes: an equilateral triangle, a circle, a square, 2 dashes, 3 dashes, a long rectangle, and a trapezoid. Each shape was printed on decal paper and individually applied.
Here is the finished product.
And a reference picture of the studio model.
While I had the saucer upside-down, I tackled the in between bits on the walls of the saucer. I cut up the decal, eliminating the saucer bands and applied them randomly between the windows.
Finally, the time to add the markings. The starboard side gets a decal that says:
STARSHIP U.S.S. OLYMPIA ・ UNITED FEDERATION OF PLANETS
Apparently this marking was designed to go on the neck at the separation line. When Douglas Trumbull took over on Star Trek The Motion Picture he added it to the pendant on either side of the secondary hull, and this has been carried over on all Federation ships (Reliant, Excelsior, Stargazer, Enterprise-B, Enterprise-C, Enterprise-E, etc.), except for the TNG ships designed for TV and the prequel series and the new 'Kelvin' timeline of the new movies.
Here is the port side with the gangway port.
Next, I turned my attention to the upper saucer, applying the same geometric decals around the B/C deck.
Once I finished that I moved on to the rim on the saucer.
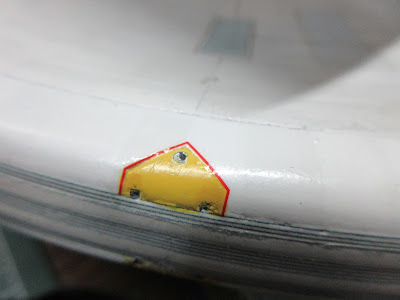
The next bit of repetitive decal application are the 20 squares that go along the saucer. These bits are painted silver. These red squares actually contain very fine text saying 'warning'. These are personnel hatches. Kirk, Spock, McCoy, Decker and the Ilia Probe used one of these in Star Trek The Motion Picture to walk to heart of V'ger (to find Voyager 6). This feature is on all of the TMP-era starships (Reliant, Stargazer, Excelsior, Enterprise-B, etc.)
The next thing I decided to do was to add extra detail. On the Reliant studio model, there are tiny red and black squares on the model, so I decided to add more detail to the ship. I figure this is the best time to do it when its easier to flip the saucer around.
The saucer is 97% complete I'd say.
That wraps up this entry...more decalling on the way!
Happy Model Building!
Star Trek and all related marks, logos and characters are solely owned by CBS Studios Inc. This fan blog (production) is not endorsed by, sponsored by, nor affiliated with CBS, Paramount Pictures, or any other Star Trek franchise, and is a non-commercial fan-made blog intended for recreational use. No commercial exhibition or distribution is permitted. No alleged independent rights will be asserted against CBS or Paramount Pictures.


No comments:
Post a Comment