Tuesday 17 June 2014

Polar Lights/Round 2 USS Enterprise - Space Seed Edition - Update #7 - repost

...This is a repost of an older post.  Some how it got deleted and I've already revealed the model earlier today.  Enjoy!!

Greetings...well this is the last update before my final reveal...

The last two things for me to address has been the lighter accent colours on the engineering section, and the 'pencil-thin' gird line decals on the saucer.

ENGINEERING HULL

Masking off the ship wasn't terribly difficult...


...what was difficult was dealing with a 'sputtering' rattle can.  I know, I haven't yet graduated to the airbrush level (one of the main reasons I haven't built my 1/350 Refit Enterprise or a few planned kit bashes from the TMP - The Motion Picture era, which is one of my favourite for designs and as a hybrid of both TOS and the TOS films), and this experience exemplified why I should take the plunge and elevate my model building to the next level.  After 4 tries, #5 was a winner!  (with a paint build-up).  Nice to finally see all of the lighting!


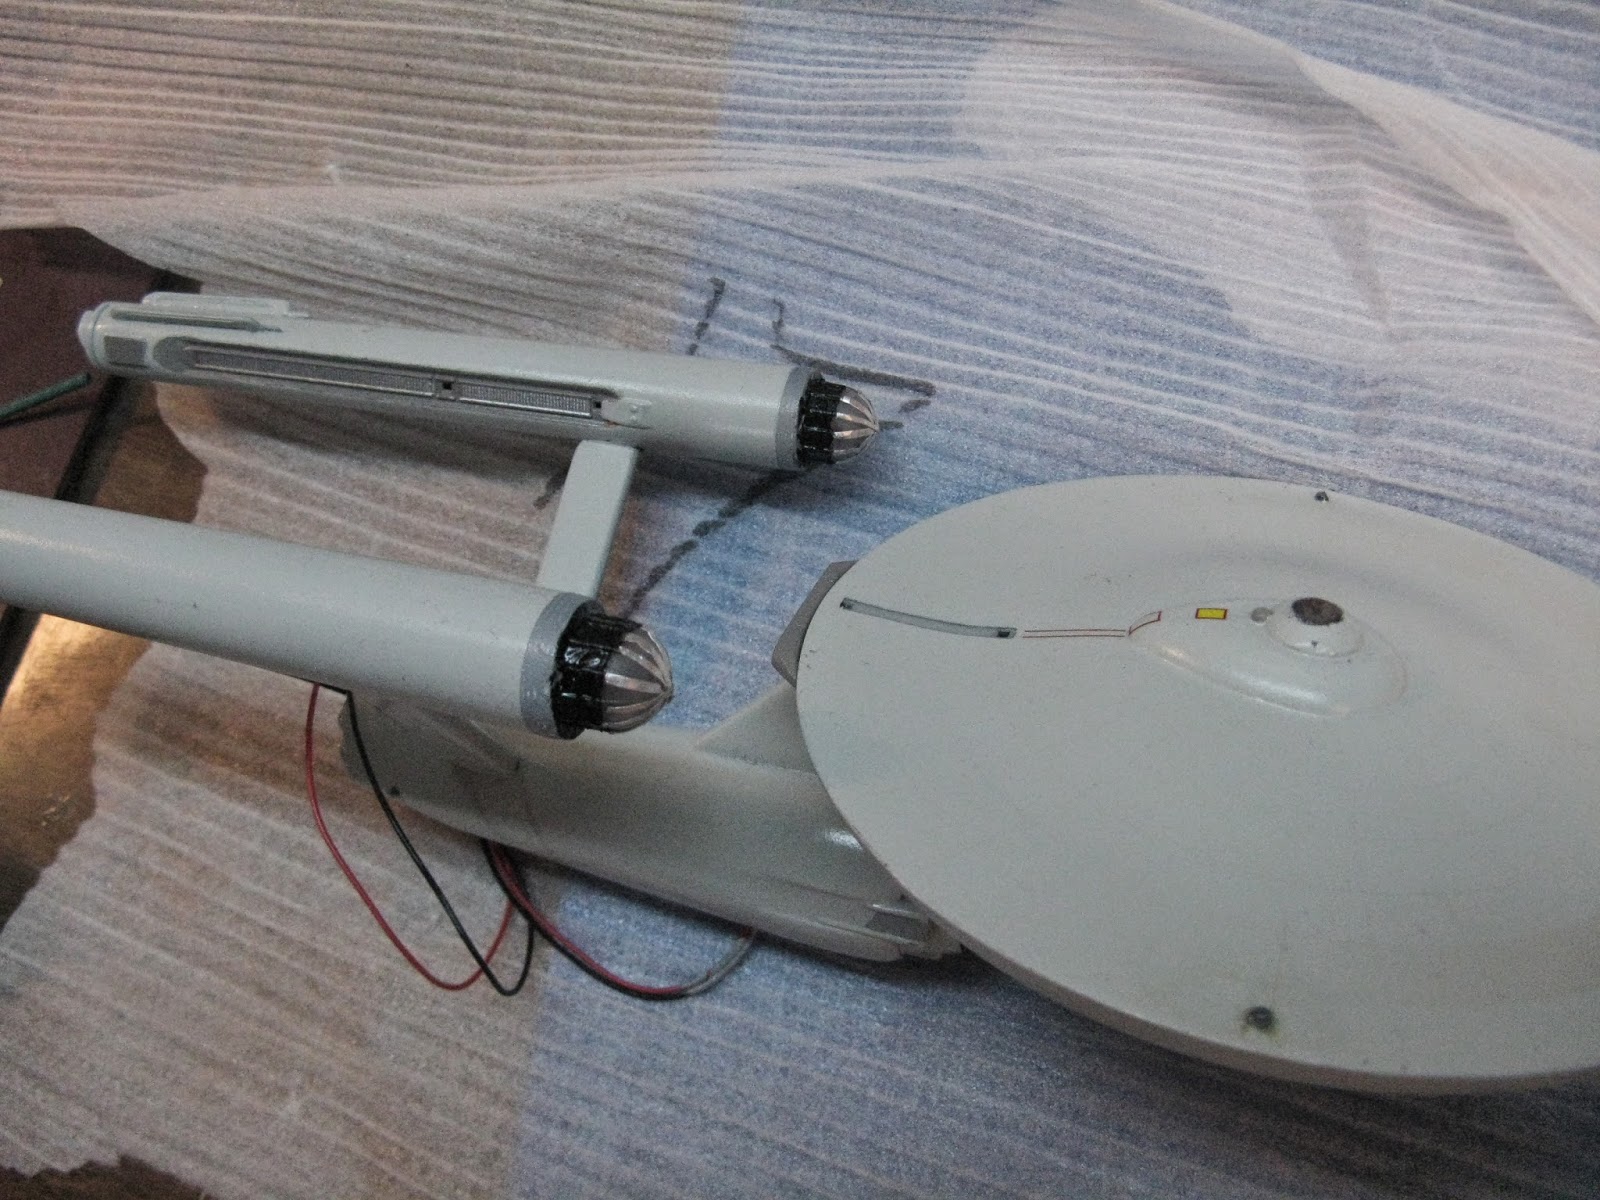
I light-blocked any light leaks using Tulip and realized the hard way the Bussard Collectors don't fit with the metal tape on them.  What I did was cut the tape to where the curve begins and used Tulip directly on the fake 'spinners'.

PRIMARY/SAUCER SECTION

As I mentioned in the last update, I chose to go with Acreation's gridline decals.  I must say they are very fine work, almost too fine.  The quality of the decals and the R&D are superb!  At this scale it is hard to see simulated pencil lines.  That said, to the eye, they are there. To the camera they are hard to see but that's exactly what was done to the 11' miniature hanging in The Smithsonian, before the 90's restoration...not going to debate that here other than the model maker is a fine model maker...I digress.


Do you see the gridlines??  I don't, not with this camera but they are there.   This was harder to do vs. the top side as the 'rust ring' is a good guide in laying down pie-shaped decals.

FINAL ASSEMBLY

So this is what we are left with:


Some solder and heat shrink, i was able to force (not easy) the wires into the saucer section.  I was going to glue it in place but decided not to.  The saucer doesn't fit flush to begin with to the neck.  Having the hole open where the impulse engines goes was invaluable to stuffing the wires into the hull.

Presenting a 'whole' starship:


I was only going to do 'marking decals' today, but had a change of heart...


Next step is weathering, a dull/matte coat and hook up the base to a switch (which I need to buy) and seal everything with Testor's dullcoat.  For now I leave you with an old 1/1000 scale refit I built in 2000 (with a busted nacelle) and the Botany Bay amongst a busy/messy workshop.


Happy model building and peace!

Monday 16 June 2014

Polar Lights/Round 2 USS Enterprise - Space Seed Edition - Update #8 (Final Reveal)

Greetings, it's been a long time with this little model, mostly due to work commitments, a twisted ankle and a very bad flu.  That said, here it is:


I hope you enjoyed the build on this model...next build USS Defiant NCC-1764, The Tholian Web Edition.

Happy model buiding!!


Saturday 14 June 2014

AMT/ROUND 2 USS DEFIANT as seen in 'THOLIAN WEB' 1/650 scale Update #1

A Tale of Two Defiants - 23rd Century as seen in 'The Tholian Web'...

This is going to be a unique build...it's a glow-in-the-dark model, molded in glow-in-the-dark plastic which means...I can't paint or putty it, so this is where neatness counts in a big way.  Also, this model brings back fond memories as a kid building the old AMT USS Enterprise, straight out of the box....Here we go!


I love this!!  This is sooo retro, it feels like the original box art!.  Great job Round 2!


UNBOXING

There are 3 bags, the saucer, the rest and the newly molded 'Tholian Spinners'.  Also the large decal sheet included in the first R2 re-release of the AMT 18" USS Enterprise.  I still take my hat off to both Polar Lights and R2 for giving us such an accurate decal sheet with windows.


This should look familiar to anyone aged 90 - 25 who built one of these kits in it's 35+ year run from AMT.  When I built mine as a kid (and I tried to build the fleet) the font was very wrong.  Again, thank you R2 for provided accurate decals.


As this model is molded with  glow-in-the dark plastic, I decided I would use an 18" 'black-light' to illuminate it.  Since I can't paint this model, except for accents (impulse engine, end caps, deflector dish), these are areas I can modify.  First thing, the bridge dome and lower sensor dome are the wrong size and don't match the filming miniature.  The dome on the left is from an old 22 inch AMT Cut Away USS Enterprise.  What I'm going to do is cast that part as replacement domes.


 Here is my first test with the black light.


THE STAND

Normally this isn't where I start on a model but as this is a custom base, it needs attention.  The base is made of 5/8" thick plywood with a 'studio wall' with The Tholian Graphic included in the box and a ceiling to mount the black light.


The model seen here is another 18" build but a complete redo of most pieces to look like a half scale studio miniature of the 3' studio model.  Lots of subtle differences here.  Reasonably good stand-in for now.


So this base has been fun to build and uses a different skill-set when wood working vs. model construction.

This is the underside of the base.  The white strips are 3/4" ply strips left over from a different building project (apple boxes for my production company).  The strips allow for extra space along the back of the model. 


I countersunk three lines to allow for Stanley L brackets


Same done for the ceiling portion.


Part way.  I didn't countersink the back as I didn't want to compromise the strength of the plywood sheet.


Here it is assembled with the black light in place as a test.  The back wall will be covered with The Tholian Web backdrop.  The base will have sheet of clear acrylic with 'mirrored' paint sprayed on the back of it.  I'm hoping this will help bounce the light from above the Defiant to the bottom section.  The model is quite translucent and even the glow from above will glow to the bottom.  The finishing details will be made with styrene to do the trim work.  The bottom 2 cut outs are to allow for front places switches (one for the web, the other for the Defiant.)


I hope you enjoyed this first update.  Next, cleaning parts and prepping the few spots for paint.  I will be scratchbuilding a new deflector dish and housing, addressing the bottom dome and reworking the aft end caps on the nacelles.

Cheers for now and happy model building!!  Stay tuned for some finishing photos of the USS Enterprise Space Seed Edition, Update #8.

Sunday 8 June 2014

RETRO BUILD: AMT/ERTL Galaxy Class Tesla (Enterprise-D) Part 4

Hello again, here is the next chapter in my retro build.  I'm currently in decal hell on the saucer of the Space Seed build, so nothing substantial to report yet, so here goes the retro build...

DEFLECTOR DISH...

To me, on this model, the dish is a signature of good design.  I still have my deflector dish from when I built the 'fiber optic edition' back in the mid 90s.  Something I figured out at the time is the dish and housing is copper and the blue light is a reflection.  Fast forward to 2014, it still holds true. 


In actuality, the dish and housing were painted orange and for Star Trek Generations, the housing was painted a mustard yellow.


Old and new.  I used the old dish assembly to fill in the opening on the hull with putty so the join is seamless...


As a light source, I used 3 LEDs from what was left over from the LED tape from the Nacelles.


REGISTRY LIGHT

I decided early on, I want a registry light on this model - I know it's not canon, neither is this model's registry, so moving on...

First I cut a hole in the area of the 'B/C deck' (the superstructure underneath the bridge - Actually the bridge is buried in this deck with only the top section showing above...strange design but I thing this was one of those things where the architecture had to fit a deck plan, and don't get me started on 'Ten-Forward'...I digress, here's the light!)


I trimmed down an LED to size and still that was too big.  I also went through many LEDs, cutting them with a Dremel cutting wheel.  This structure easily houses the LED, though not canon.


UPPER ENGINEERING HULL

This piece always boggled me, it has soo much camber in it (warped decklines) I question who made this original part.  Also by sanding off the raised 'aztec lines' I lost some detail on the scribed panel lines, this was tricky to re-scribe or I'm an idiot.

ORIGINAL PART


I did my best to re-scrobe the radial panel lines.  The concentric lines took some engineering to do.


This is what I got (with the neck temporarily attached):


Unfortunately in haste, I made a critical error...I forgot to leave space for the 'blinker LED' which run the 4 nacelle fiber optics (next time they go in the nacelle) as well as the bridge blinker and the lower hull blinker.  When I built this model, I used solely an RGB LED.   The blink rate is off and it blinks colour.  It looks neat for somethings (poor man's nacelle lighting) but that's what I used for what I knew to do at the time.  Regardless, I had to perform some surgery on the Upper Engineering hull...


I cut along the newly scribed gridlines and it worked flawlessly!  Here is the start of the Aztecs...


NACELLE ASSEMBLY

Not forgetting, at this stage the nacelle assembly was separate from the rest of the model.  It req'd some sanding work and I discovered quickly another thin layer of styrene which made life easier.


That will do it for me for an update.  Check in again and see my current project, USS Enteprise/Botany Bay as depicted in 'Space Seed'. Cheers!