Greetings!!
This entry I will be assembling the the Secondary Hull of this vast starship model and bring everything together. Let's get started!
An Overview
The Secondary Hull on this model is really made up of 7 main parts as shown below:
The beauty of this design is the panel lines hide the seams. However, unlike the TOS version, it needs to be cemented together to stay together.
 |
| Refit on top, TOS on bottom. |
A Comparison with other Refit Kits:
The best fitted kit in my honest opinion is the 1/1000 Snap-Together Round 2 kit:
It goes together in a similar fashion and easily comes together. Neck included.
The worst, is the good old AMT kit:
 |
| The extra paneling makes me cringe, it's not easy to fully remove. |
The AMT kit also was not exactly straight either.
The biggest difference between this reissue of the kit from 2009 compared to the original release in 2005 by Polar Lights is using a solid metal pole for the stand vs. a convoluted clear stand which did not support itself well without having a weight on it.
The fore section of the Secondary Hull is a 'retaining ring' much like what you would see in a wooden barrel which holds the four sections of hull together was modified to accept the new rod design.
The older model didn't feature this as seen below.
 |
| 2005 part on left, 2009 part on right. |
 |
| I'm glad I have both parts, should I ever decide to mount it in a different point in the future. |
Construction
As always with any build (each subassembly is like a 'mini-model'), I always light block.
I am also modifying kit to have a similar window arrangement to the original drawing of the Refit as seen below.
To begin with, neither side of the refit has exactly the same window layout:
 |
| Starboard on top, port on bottom |
Also, both the 2005 and 2009 release included two different versions of the lower engineering hull.
 |
| Enterprise Refit on top, Enterprise-A on bottom |
The main difference is gridline pattern on the 'cutout' curve under the shuttle bay, and additional lines on the bottom as well. My build is supposed to be a newer version of the Constitution Class - newer than the Ent-A, so it will be a slightly modified paint job too, just to be a unique build.
Back to the windows, here is a comparison between my build and my 11 year old model:
 |
| Starboard, my kit on bottom |
 |
| Port, my kit on bottom |
 |
| Starboard, my kit on bottom |
 |
| Port, my kit on bottom |
 |
Both side panels directly compared.
|
PRE-PAINTING
I like to pre-paint my parts for a number of reasons, but mainly here so I can mask off the windows in sections (since I don't have a window masking kit). It also allows me to experiment a bit too, so long as everything as light-blocked.
On the studio model, there are 5 mounting points: front (removing the deflector dish), rear (through the shuttle bay), port & starboard (a side panel on the secondary hull) and from the bottom.
 |
| from Star Trek VI: The Undiscovered Country |
 |
| This panel is actually a mounting point on the studio model. |
The remaining area gets painted a light tan colour.
On the side walls, I used a similar technique of painting the 'removable plug' a different shade of white. The aft section still retains its white primer as I know there will some putty work back there.
For the 'strong back' feature, there has been much debate to the actual colour. Round 2 did their decals for this kit in blue.
In Star Trek The Motion Picture, it appeared as several shades of grey but I have heard before there was a green shade to it. I've decided to go green just to make this one different.
 |
| This is a base coat which will toned down and have a clear decal, similar to the one above go over it. |
For the from ring which actually gives the secondary hull structural integrity, I'm painting the entire part. This is also the access hole to get at the internal wiring of the model.
The inner rings are painted a light grey-green, the same colour I've used previously on other TOS builds. By pre-painting this part, I can clean up details, lines and allow the paint to really cure before I handle it and glue it together. If I have to touch it up, so be it!
For the shuttle bay fantail and frame, I masked off the deck as it is a continuation of the flight deck. This part also helps to tie together the rear of the secondary hull.
Here is the part painted up, I do know I will have to seam the edges with filler and primer, just so long as the areas like the window ports are painted correctly.
Clear Parts
Once completed, the next step was to insert all of the windows. For the additional holes, I used 'canopy glue' to create a window pane in each opening.
Also during this step, I started to mask and paint the various clear parts:
 |
| The three quadrilateral shapes there are part of the shuttle bay bulkhead and glow blue. |
Regrettably, I'm having issues currently with my airbrush, so I had to paint this with a 'rattle can' and it smeared the detail.
For the Botanical Garden windows, the vertical frames require paint. I masked off each pane with yellow Frog Tape.
 |
| These are the windows for the Arboretum. |
The results are similar to the observation long windows.
 |
| Not perfect, but everything can be fixed. |
LIGHTING
The actual Secondary Hull in this build has a very simple lighting plan:
Spots, Strobe, Nav Beacon and Main power. The Deflector Dish will be a removable piece and will be wired up separately.
The bottom of the Secondary Hull has ribs to support the
'internal workings' as seen in the last build update. I like to be neat with my wiring but also ensure the wiring is accessible up until the point of sealing up the ship. So I drilled out access holes, much like an electrician will drill through stud framing to run cable inside walls.
SPOTS
There are 5 spots on the Secondary Hull: top and bottom of each nacelle pylon and a tiny one underneath the shuttle bay.
For the pylons, I hot glued a warm white 3mm bulb to shine up from the sidewalls.
 |
| It was trickier than I originally though to align them and make them even. The one on the left approximates the studio model. |
In future, especially for the sidewalls, I will create a jig to hold the LED in place.
For the top spine, I did a similar process.
The last spot light (which also houses a nav beacon) is under the shuttle bay.
This part is a 'plant on' part as shown in the instructions:
However, I've scoured the clear parts and I can't find it! :(
Every time I unbox a new model kit, I photograph it, not only to be shown on this blog, but as a reference if I'm searching for a part. This kit, has about 200 parts, mostly tiny clear parts.
If there are clear parts, I keep them sealed until I need to use them.
 |
| This is the sealed kit! It takes up an area roughly 7' square! |
In a perfect world, I like to keep parts on their sprue trees until I need them. It also makes it easier to paint them on the tree if they are tiny parts, like small figures. When I did open up the clear bags, I found most of the parts were not on trees and loose. This does happen. I think it was missing from the start. This happened to me before on my NX-03 Challenger build where the deflector dish spike was missing.
 |
| The still sealed clear parts |
I considered scratch building this part from thick styrene, but I came across another part and thought this might be a better solution - use an existing clear part from the old kit! The model comes with shuttlecraft, travel pods and 'work bees' which are tiny personnel craft. The upper half of the travel pod in this kit is clear. It is a similar shape and will accomplish the same task.
 |
| Travel Pod |
Here is the instructions to create this little ship.
 |
| Top piece is clear! |
What I've done is hot glue a warm white SMD in the back of it, which will face forward and drilled out a hole in the centre of the round section for a 'blinkie' LED.
 |
| The SMD is behind the piece of tape. |
It's not canon, but it works for me for this build, after all, this is not the USS Enterprise NCC-1701-Refit or Ent-A! It can be different and I embrace difference. Considering this build is now going to be named something different, I call this an upgrade.
Once I added all the lights to the part, I hogged out the opening on the model to receive the wiring.
I then hot-glued the part in place.
 |
| The part needs to be light blocked. |
Here is a comparison from Star Trek The Motion Picture of the the studio model.
 |
| from Star Trek The Motion Picture |
NAVIGATIONAL BEACONS
The Refit Enterprise in
Star Trek The Motion Picture, there are a lot of inconsistencies of the blink rate of the 'Nav Lights'. Sometimes they blink, sometimes they don't. Star Trek II shows it clearly in the Battle of Mutara with the Reliant, and the nav light above and below the shuttle bay blinks at the same rate as the Nav Lights on the Saucer. For the upper nav light, I'm using a SMD.
MAIN LIGHTING
For the main lighting, I'm using LED strip lights to bounce light off of the hanger deck assembly I built in the last blog
entry.
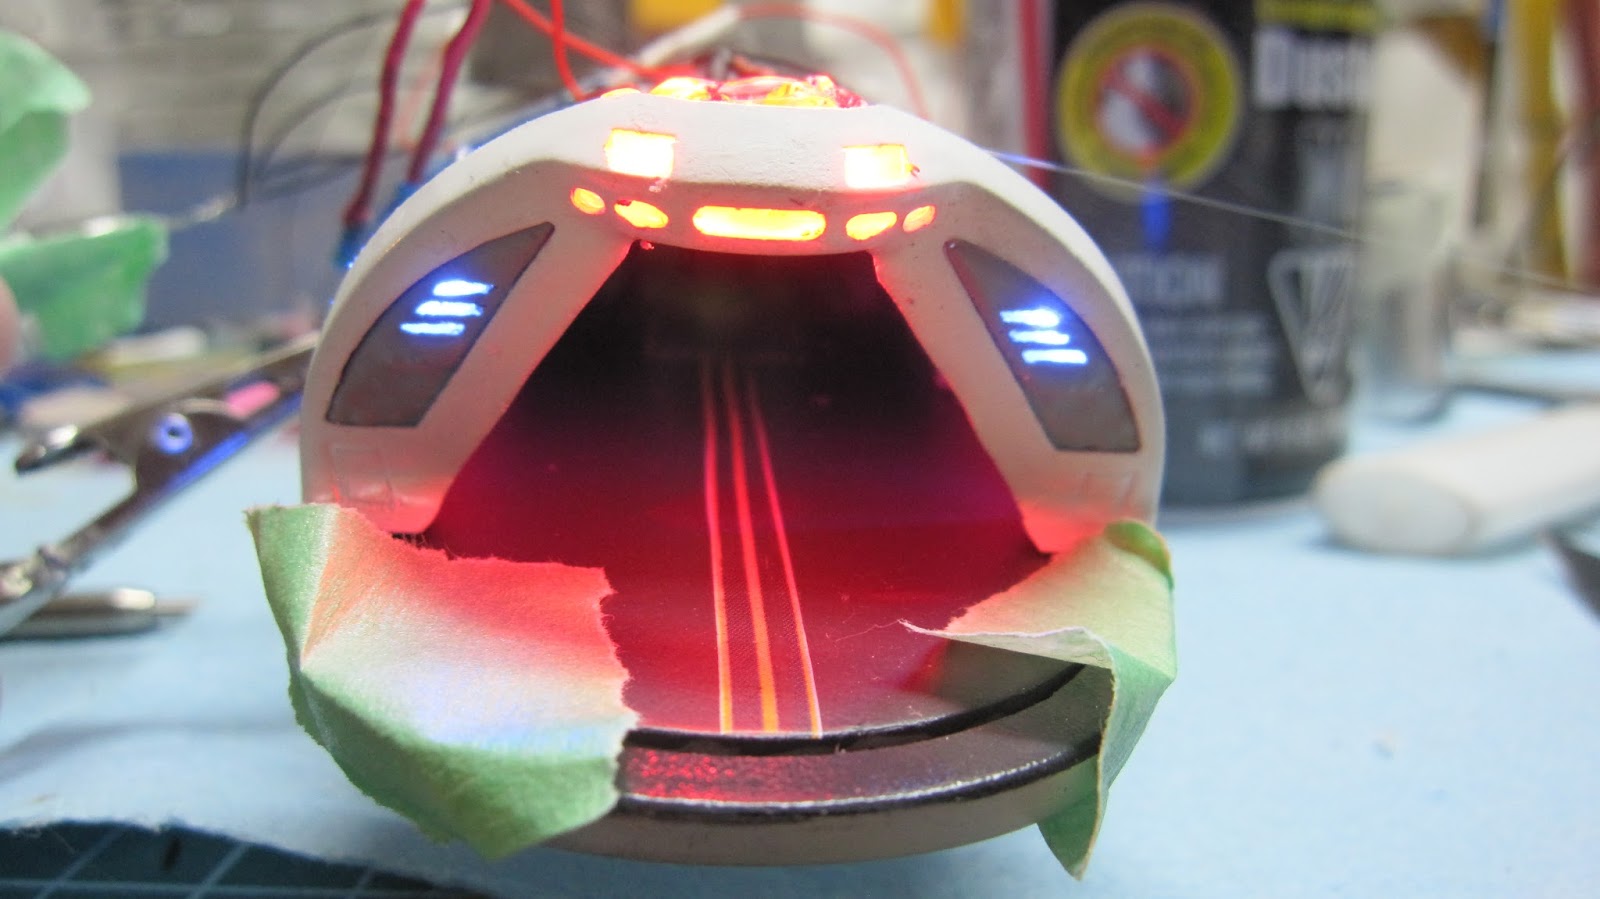
The anti-collision light really is quite bright, just like it appears in Star Trek The Motion Picture.
A look inside to see the light bouncing off of the baffles I made with white fabric tape.
Even without additional lights, the side walls light up nicely.
For the sides of the secondary hull, I'm using long strips of LED tape to illuminate both the openings in the cargo bay but also bounce light back.
Now with the side lights illuminated.
 |
| a look inside |
With the SecondaryHull top (strong back) in place, it is clear the light bounces all throughout this model. I think in future builds I would use single density LEDs for this part.
It also nicely illuminates the hanger deck too.
 |
| A comparison with the old AMT secondary hull |
For the upper portion of the strong back, I used some single density warm white LEDs to match the look of the following matte painting from Star Trek The Motion Picture:
 |
| From Star Trek The Motion Picture |
This is the warm white LED I purchased in strips from another electronics store which unfortunately has gone out of business last year.
 |
| The whole of the lighting under the strong back. |
Here is the lighting in the shuttle bay.
This is going to wrap it up for me for this entry. Next entry I will finish the work on the secondary hull, gluing it together and preparing it to mate with the saucer.
Happy model building!!
All still images taken of the USS Enterprise from Star Trek are being used for educational use only. This blog does not claim rights of ownership over any images sourced from the internet.