Finishing up the details on the Defiant's saucer/engineering hull
The Impulse Engine. I used pieces of old screen material to simulate the texture surrounding the impulse engines. I marked out the 'blank section' with Tamiya Tape and made a template for the openings from the 1/350 Enterprise, scaled to 1/650.


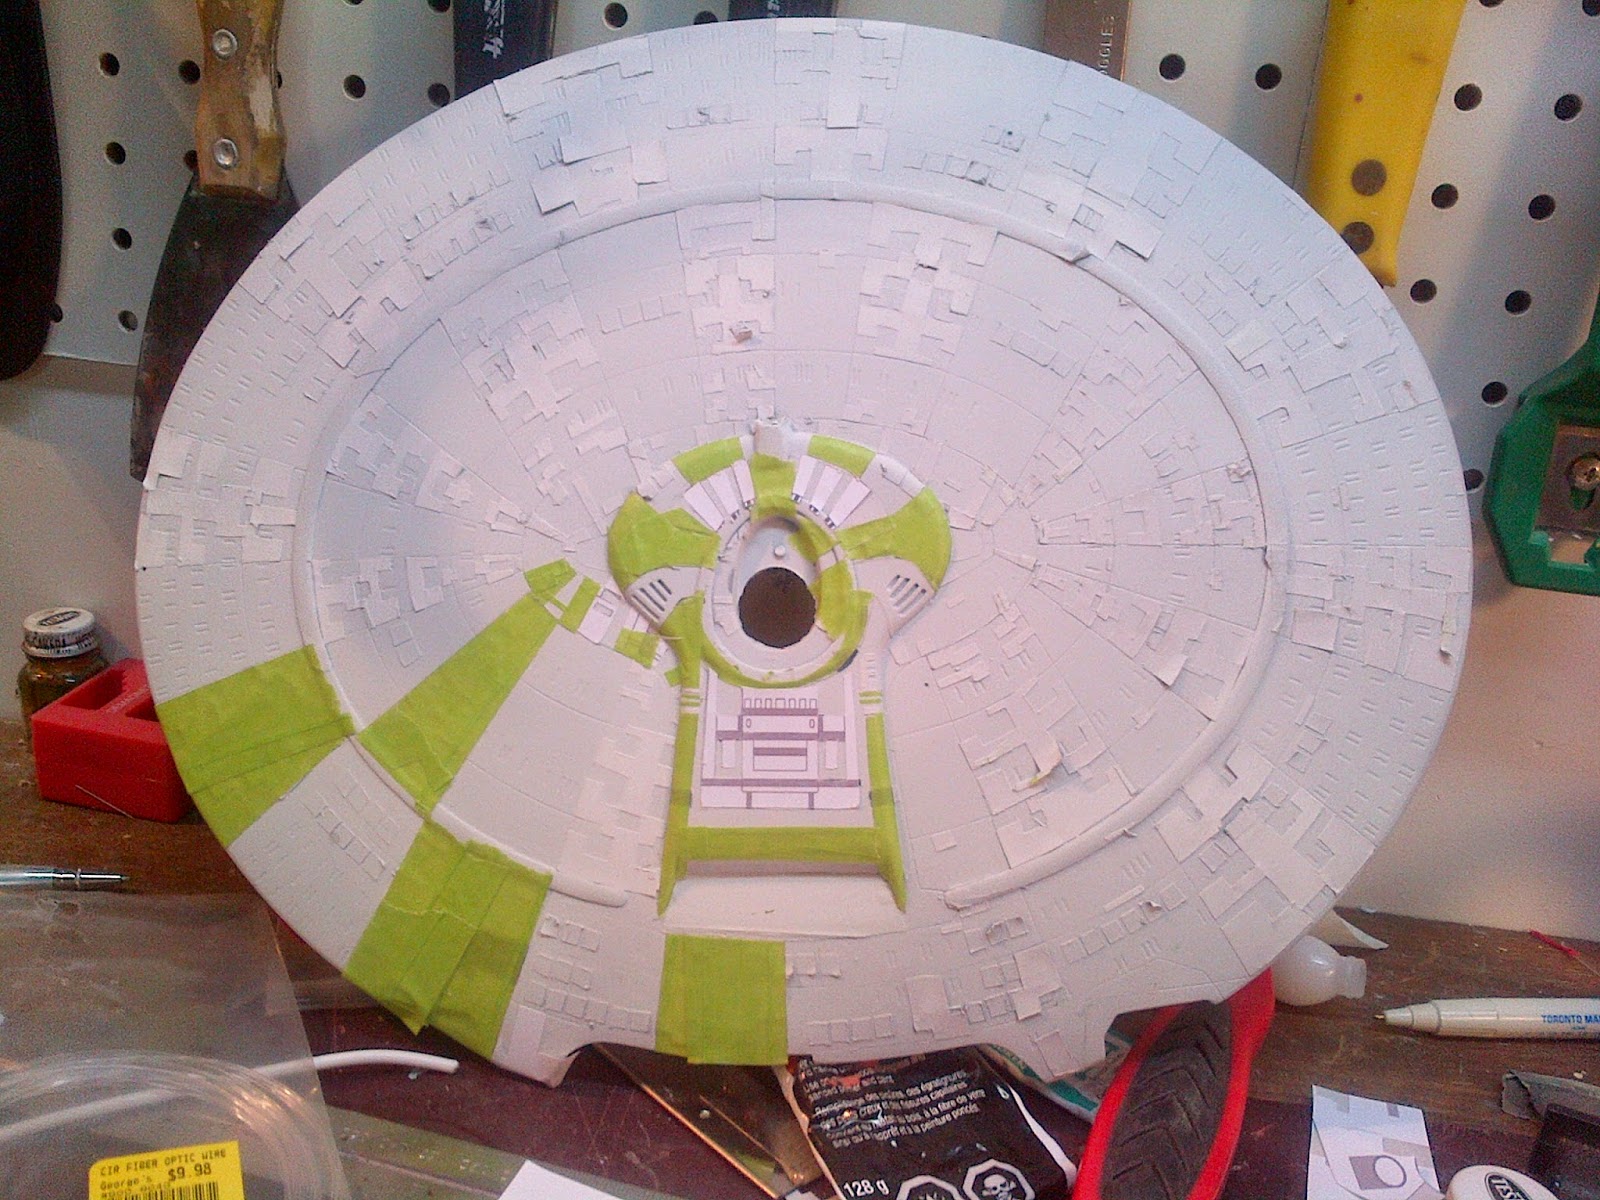
Deflector Dish and Housing
As I previously mentioned, I decided to build my own housing and modify the dish to be as close as accurate as I could. It also means I can paint is separately from the model.
The housing:

The dish:

To make the antenna and rod I used a simple piece of sprue for the back side (I didn't bother with the 'hinge joint' as it's difficult to see when mounted) and used a brass rod for the antenna shaft. Another piece of sprue shaped into a cone makes the base and the ring at the front of the tip is a piece of heat shrink glued to it.


And with a bit of paint...

Moving forward and completing the primary & secondary section


NACELLES
This part of the ship has a lot of parts considering most Trek models are just half sections. And for this model, I was able to modify most of the nacelle pieces. I left a channel to feed wires front he secondary hull through the pylons for lighting for the Bussard section. I found this section difficult to cement together as the to halves of the cylindrical nacelles were quite warped despite using the boiling water technique to fix them. CA fixed that (aka Super Glue).
Below you can see them masked off for painting.


The 'reactor loop' as it is often called is part which goes on the inboard cutout section. The part is not quite accurate and I re-sculpted it to be more accurate as well as adding a front piece using my 1/350 version as a reference, cut from pieces of the model's stand (way too lightweight to hold this model).


Ready to be attached to the Defiant. It should be noted that the large dome on the dorsal side of the secondary hull is actually a Bussard Collector from a leftover piece of 1/1000 NX-Class Refit model I will be building very soon.


The End Caps - this section of the model always bugged me, even as a kid because it's not at all accurate to what the model looks like on screen. While I was casting new globes for the 1/350 Enterprise I will eventually build, I discovered the domes were roughly the same size as the 1/650 Bussard collectors. This got me thinking 1/650 to 1/350 is similar to 1/1000 to 1/650 scale wise. Since the 1/1000 USS Enterprise Kit has many different nacelle variations and I have bought 4 of these kits over the years (a built one as a gift, Space Seed version, a half built USS Intrepid and future kit-bask), I have lots of nacelle parts, specifically unused Bussard collectors. So I took 2 of them, cut them off and cut off the inaccurate little bump on the back of the end cap and filled it in.


The dome I used was a 'pilot' version so there was a hole to be filled with a piece of sprue and Evercoat.


The 'intercoolers' had a lot of clean-up as the it looks like the mold used to make it doesn't akin properly. Also even though, normally the inset is painted 'hull colour', in this case would not be painted, I felt it should be darker just to add some dimension to the part.

Forward of each of these intercoolers is a rectangular section which I cut out of the stand. These are only present on the 'production' version of the TOS USS Enterprise, which this is supposed to be.
The Bussard Collectors - I had some time to experiment with this, I could have ordered aftermarket parts but that wasn't in my budget for this model. I spent a few hundred bucks on it already, not to mention just buying the model. When I discovered the glow in the dark plastic transmitted light extremely well, I decided to do a basic lighting using only warm white LEDs and would paint the exterior of the domes with clear red.
The first thing I noticed while building my other 1/650 AMT Enterprise (named USS Constitution) is the 3 rings/indentations on the nacelle should be 3 rings, 4 indentations and the distance between the dome and the rings is too long, by about 3/16 of an inch or so. So I cut that down and chamfered the edge to make it conical.

I rationalized that since this Defiant was caught in the Tholian Web, the fan blades wouldn't be spinning (easy way out...sort of), I decided I would paint them on with metallic silver and paint the whole Bussard with clear red. To do the blades, I borrowed making templates I bought for my 1/350 which I won't be using - I have the brass etch set and don't need masks for the inner domes. I applied it to the dome, cut off the overhang and masked the base. Sadly, they didn't fit right (it wasn't made for this scale and the paint bled through. That's what sandpaper, files and sharp X-Acto blades are for.

Once I cleaned this up, I painted it with clear red, then frosted it with multiple coats of clear satin and matte finish. I also drilled out the unlit running light which is on the top of the Bussard collectors, a detail I only recently realized was there.


The following video shows the model ready for decals, with the deflector just sitting there.
The Decals
I really like the fact Round 2 supplies a huge decal sheet for all of the windows and markings on the model. It beats painting them. I also bought a saucer gridline decal from Acreation models. I made a few other decals, including the 3 concentric circles on the lower saucer, the triangular landing legs and a few modified decals to properly fit this model as well as TMP style docking ports. (I figured since this model is 1764 vs. 1701, technology would have improved and there may be additional features.)

The final details to complete model included adding a custom 8 prong decal to the lower sensor dome and the 'probe' on it made out of a piece of fiber optic cord as well as attaching the deflector assembly and the 3 box-like structures under each Bussard collector, made again from the stand on the nacelles. Here's a sneak peak!

The Stand
This is the biggest and most complex stand I've build for a model to date. That said, it's easy for a guy who gutted and built his own kitchen with a background in carpentry.
When I last left off it was a basic plywood structure made of 5/8" ply with a threaded lamp tube as a rod (I have a brass tube to cover this). I covered the edges with 1/8" styrene I bought in bulk, cemented with hot glue.

For the platform, I wanted a 'mirrored' effect. So I used a "Chrome Paint" by Rustoleum and it is a glorified gloss silver. And it looked like crap! In the end after spending $35 on various paints, I decided to use another type of metal foil decal I had inherited from a commercial shoot about 6 years ago which has a brushed aluminium appearance. I then sprayed this with a dull coat and it has a 1960's ish metallic look which is a happy accident.

Once I had the rest of the stand glued up, I treated the plastic just like a model by the same old process: sand, fill, sand, primer, repeat until done.

I sprayed the base flat black and made custom decals for the button labels as well as the title of the display in photoshop and printed them on white decal film.

It's funny, I will admit I'm terrible at losing parts and my goal for future builds is to be better organized. I lost the 'Spinner' parts at least 3-4 times, but fortunately they are molded in glow-in-the-dark plastic.

I sprayed them in my 'chrome paint', making off the rear section to remain as glow-in-the-dark.


More to come, next update will be the final reveal! Happy modelling!!