Wednesday 31 December 2014

Star Trek Space Ship Set - AMT 1/1600 Scale - Update #3 and FINAL REVEAL

Greetings and Happy New Years!!

This will be my last post of 2014 (for obvious reasons)...

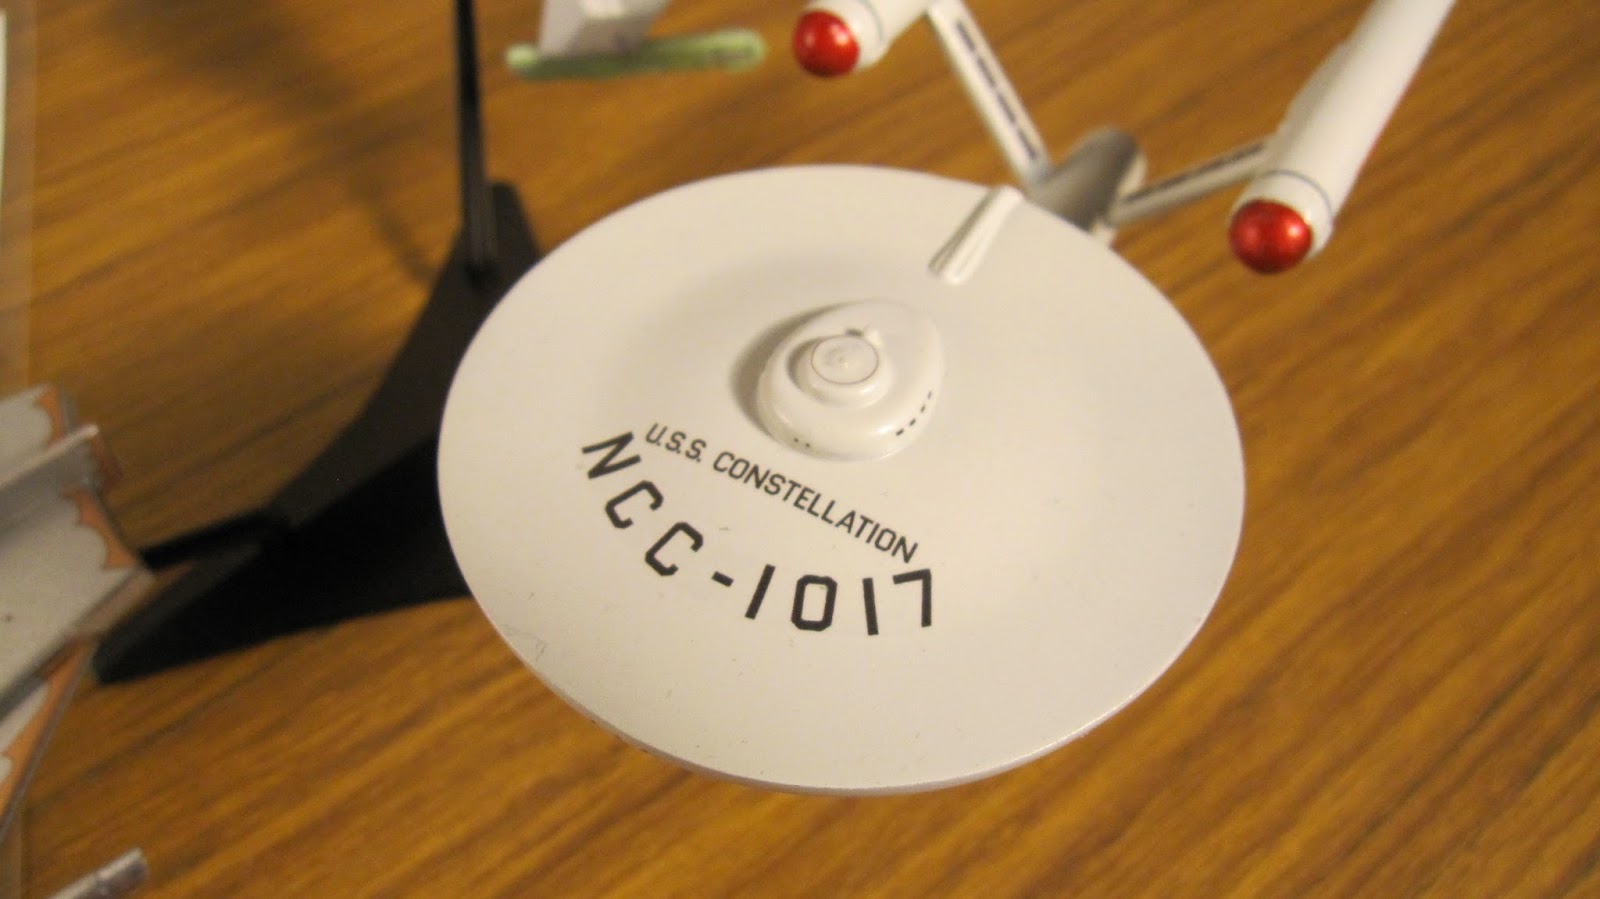
So I will get to the point, here is this little set completed.  I am really pleased with how each little ship (each one under 7" long!!) turned out.  The most complicated ship out of this set to finish was the Klingon D7 Battlecruiser.  I had to basically re-sculpt the 'head' and warp engines.  I was tempted to re-sculpt the 'shuttle bay' (originally the impulse engines Star Trek The Motion Picture redesigned that section to be a shuttle bay with the engines below - I generally prefer this version of the ship but the original design with the forward vent makes some sense if it's a big engine.) but didn't as I wanted  to keep some integrity to this kit (and I will be doing that later on with my Klingon diorama).


Since there was no way to accurize this model (everything is basically wrong - wing shape, leading edge of the main hull, proportions, etc.) I decided to keep it like the original release of the model, including making a rub transfer of where the original windows were and made decals out of them.  The rest of the decals are a copy from the larger newer kit as the original decals disintegrated when I tired to use them.


Compare this to this shot...


...with this one (minus the battle damage).  This is a screen capture I found online from Star Trek: The Doomsday Machine.  I don't normally post screen captures or repost for that matter but I do this under 'fair use' and 'educational demonstration'.


As opposed to using the Round 2 decals as a guide to make accurate markings, I used David Shaw's decal sheet from one of the model building forums to reproduce the window locations on the actual 18" AMT model, which was used in Star Trek The Doomsday Machine original series second season episode.


(I purposely took this to be reminiscent of the 2nd shot from "Star Trek: The Motion Picture" where 3 Klingon battle cruisers (K'Tinga - essentially a greebled Klingon D7 with a different paint scheme but same proportions) engage 'the cloud', aka Vejur/V'Ger.)


I hope you enjoyed this build.  I will continue with the 'NX Sisters' build of Columbia & Challenger but I'm also prepping to for another 1/1000 build (the Defiant is on the back-burners for now), a 1/1000 USS Brattain (as seen in Star Trek TNG: Night Terrors - a redress of the USS Reliant) and USS Enterprise NCC-1701-A refit!  (I've been wanting to do one again since my other refit fell off a shelf and broke).  Unique to this build, I will be lighting as much as I can, including windows!  It's going to be tricky but I'm recalling excited about it.  It will also be the first time I will be using brass etched parts!

Happy Holidays to my readers and friends!  Wishing you and yours all the best and a Happy New Year, cheers!!

Fordo

Tuesday 23 December 2014

Star Trek Space Ship Set - AMT 1/1600 Scale - Update #2

Greetings,

This update has more to do with finishing up details on the models.  My goal is to get them ready for decals by the end of this update.  I've said this before and I will say this again, 'size matter not - each model takes equal time to build' (sorry first part was Yoda but point taken, a 1/1600 scale model built to a certain specification takes the same amount of time as a larger model, like 1/650 with the same specification, if they are identical).  At this scale it's virtually impossible to light

ROMULAN BIRD OF PREY

This is the simplest of all of the models, most robust of all of the models, after all it is only 3 pieces.  That said, the seams are difficult to blend (I used more Evercoat than I thought I would as the seams were flexible).  Also it took a lot of filing, sanding and cutting to make the nacelle hemispheres, well, spherical.  It's an old model afterall, (soon to turn 40 years old! - and I'm not far behind that, just still a big kid...I digress...)


Attaching the dorsal tail fin I assumed would be easy and I could go right into painting.  I glued it on, filled in the gaps (lots of them) with red putty (3M Glazing Putty, stage 3) and let it be.  The following day, the tail was leaning to port by about 10 degrees.  I had to break it off (way too easily), sand down the glue it back. Lots of red putty, plus patience, I got a perfect seam.  Here is the model with it's base coat of metallic silver.


The only detail parts requiring paint are the fore and aft tips of the warp nacelles.  Since this model is non-canon (long story but the real BOP looks like its going warp 2 compared to this one which looks like it had too much 'Romulan Ale'), I decided to paint the over-sized Bussard Collectors gold and the vents on the model chrome.


Clear coated and ready for decals...


KLINGON D-7

I've always loved the design of the Klingon D7.  It almost has an 'animalistic' look with the long boom (neck) command bubble with bridge (head with hat) and the main body which looks like a manta ray.  I digress.

The seams though on this little model were horrible. In the process of working on it, the 'head' broke off.  The most flimsy part of the design.  I ended up drilling a small hole in both broken ends and put a piece of brass in it secure it.


I removed the inaccurate and over-sized ventral vents by sanding them out.  The actual model has more of a fold between the wing vs. body to more sanding, filing and filling to be done.


I masked off all of the areas that require chrome/copper paint so there won't be a build up of paint in those areas.


Everything was working as planned, I masked the above areas for the grey area as seen above.  I usually let these models dry in front of a 6 inch fan, this model say took flight and the port nacelle broke off.  I tried to re-glue it multiple times until I then realized I need to put a brass pin in it.


This is after a multiple passes of putty and sanding...


A few more coats of painting, filing and sanding...


In the process of masking the D7, the head started to break off, again...


I decided it would be far simpler to leave the head off while I pain the model and treat them as 2 models.


The D7 has a 2-tone paint scheme, something I have to admit has really grown on me.


However in my rush to paint this, the glue residue attached itself to the grey section.   I'll leave that for now.  Now the remaining painting...


While it was wet, I was too anxious to put it back on the stand and gouged the paint, more than once. So more repairs.


USS CONSTELLATION

For this little model, I want it to be a model of an 18" AMT kit, painted to look exactly like the Constellation from 'The Doomsday Machine'.  What's weird for me is the model wasn't painted accurately and was very light in colour.  Here I have left the original raised concentric circles and 'phaser dimples'.  Not accurate to the USS Enterprise.


A light had was required to paint the nacelles.  I used a subtle 2-tone grey around the 'inter-coolers' and inner trench.  For the Bussard domes on the front of the nacelles, I painted them metallic silver, then painted them with clear red and finally a coat of dull coat.  They look layered and translucent.


The trickiest part of gluing up any Star Trek model is getting the parts level to each other.   This model didn't want to be level.


Ready for decals


DECALS

I'm making a custom sheet of decals using David Shaw's 1960's style decals to replicate the window placement of the original model, available in a google search off many model building forums.  For the Romulan ship, I scanned in the decals from a 1/650 scale modern kit as the original decals are too old to use.  I modified it to have less seams.  For the D7, I've used a combination of modern decals and the original decal sheet (wish me luck, it may not work).

That about wraps this up during the holiday season.  I wish everyone a happy holiday, regardless of what you celebrate (I celebrate a non-religious Christmas, to each their own).  Happy model building and Happy Holidays!!  Cheers!