Greetings!
This blog entry is
part review of both the Round 2 1/1000 model kits of the Refit USS Enterprise
from the TOS feature films and The USS Reliant from Star Trek II The Wrath of
Khan (+ numerous guest ships on Star Trek The Next Generation and Deep Space Nine), part build-up and part essay on these studio models.
(Disclaimer - I normally don't to screen caps in my blogs but I do in this one to illustrate and educate a point. Sources cited were used, no copyright infringement is intended. Unless otherwise noted, all other photos are taken by me.)
TO SEE THE LIGHT…
Both of these tiny
models are going to be lit with fiber optics and LEDs. For my 1/1000 ‘Space Seed’ USS Enterprise, I
only lit the engines, a few factory clear sections and the blinking
lights.


This time I’m going to try to
deliver a miniature studio model in terms of the electronics at the same 1/1000 scale. There will be multiple channels for each lighting scheme. This is a challenge and a test for a larger, more
expensive model build I've been planning for some time. (CLICK HERE TO SEE) I have previously built the
USS Enterprise kit before 4 years ago (as a Constitution Class Refit USS
Excelsior NCC-1718 – name and number from a reference book by Franz Joseph
published in 1975) as a static kit but this is my first time building this
1/1000 USS Reliant model kit. Mine will be
named USS Brattain NCC-21166 as featured in one of my favourite episodes of Star Trek:
The Next Generation ‘Night Terrors’. The
Enterprise will be built as the USS Enterprise NCC-1701-A as introduced in Star Trek IV
and last seen in Star Trek VI: The Undiscovered Country.
For me, I relate
most of these models to my childhood. It brings out the big kid in me. I got into Star Trek when I was six years old
after seeing The Wrath of Khan. I saw
the Star Trek films before I saw the Original Series so when I think of Star Trek, this
genre pops to mind first (hard to believe how many TV series and movies spawned
from the original series). The Star Trek
models I had access to in the early to mid 80s were the TOS AMT Enterprise, the
refit by ERTL (horribly inaccurate), the K'tinga and the Vulcan Shuttle, both
from Star Trek The Motion Picture. By the time Star Trek III: The Search
For Spock came about, the Reliant, the Excelsior, the Grissom, and the Klingon
Bird of Prey had been introduced, but it took a full decade for these models to
be released commercially. I always wanted a model of the USS Reliant as a
kid. So I built my own...
My first attempt
was to take a broken AMT Enterprise Refit (the pylons often broke where they
meet the engineering hull). I reused the nacelles, the saucer and cut off the
impulse engine from the saucer. For the main body I used cardboard and 'Goop' glue to hold everything together...which it didn't for very long. No pictures exist but as a 12 year old, I could envision battle scenes from Star Trek II: The Wrath of Khan. In 1994 after finishing what I thought at the time was my 'definitive' USS Enterprise refit, I decided it needed a companion model. This was my second attempt to build a Miranda Class - USS Reliant (circa 1994):
For reference the AMT Refit Enterprise in the background was an original 'TMP Smoothy' and had a primitive Aztec paint job (referenced from an issue of Fine Scale Modeller back in the day) which was achieved with both gloss and matte white spray paint. I did the same effect on the Reliant and the rest of the details were hand painted.
Shortly after finishing this, AMT released their USS Reliant
kit which was not without the usual problems associated with model kits at that
time – inaccurate details, wrong font on the decals and few decals, but it was
head and shoulders over the AMT Refit USS Enterprise counterpart available at
the time in terms of accuracy and durability. Back in 1982, I would have 'given my soul' to have a model like this with all the details despite it's size. I digress on this, on to the models!
USS
Enterprise NCC-1701-A
This kit as you can see comes comes in 4 bags (saucer halves, dome base, the rest of the parts and the clear parts. The part count is a total of 39 pieces (26 styrene white, 9 clear styrene, 3 black styrene, 1 metal rod). Not too different from the AMT 22" Enterprise which had 32 parts! I really like the fact the pylon (wing) connection to the the secondary hull (fuselage) is well engineered vs. the AMT counterpart and the secondary hull is in 4 sections, much like the larger 1/350 scaled version. This just makes you feel like you are 'building' something rather than slapping one half to the other half, which happens a lot in model building.
The model also comes with 3 decal sheets with over 100 decals, mostly wallpaper decals to reproduce the aztec markings on the ship plus 'strong back' decals.
Here is a further breakdown of the model, ready for washing...
As I previously mentioned I’ve built this model before, but
as a static model. As a ‘snap-together’
model it also snaps apart. Back in late
2010, I glued up the major sub assemblies together and snapped the rest together.
(Note, the bridge, B/C deck and lower dome look more like the TOS Enterprise than the Refit. There is a reason for this. This was the original design for the Enterprise but after an air conditioner leaked onto the studio model, or a simultaneous idea to refine it further, caused it to be 're-fitted' once more. This model represents the older version.)
Note the warp engine glow is purple, not blue. Also the dual torpedo bay where it meets the secondary (engineering) hull is a slightly different configuration.
(I remember seeing this image on a bubble-gum collectable card from the early 80s. I wish I still had them, I had over 100 cards from Star Trek The Motion Picture. Note the Torpedo bay is different from the finished version and the rest of the hull appears as 'primer white'. My guess this was an early lighting test.)
Sadly this model (due to from one of my
modifications to fix wobbly pylons) broke in the middle of the port pylon
‘wing’. This was my reasoning to buy
and build another one of these models. I plan to eventually make this a battle damaged diorama with a Klingon ship - both static.
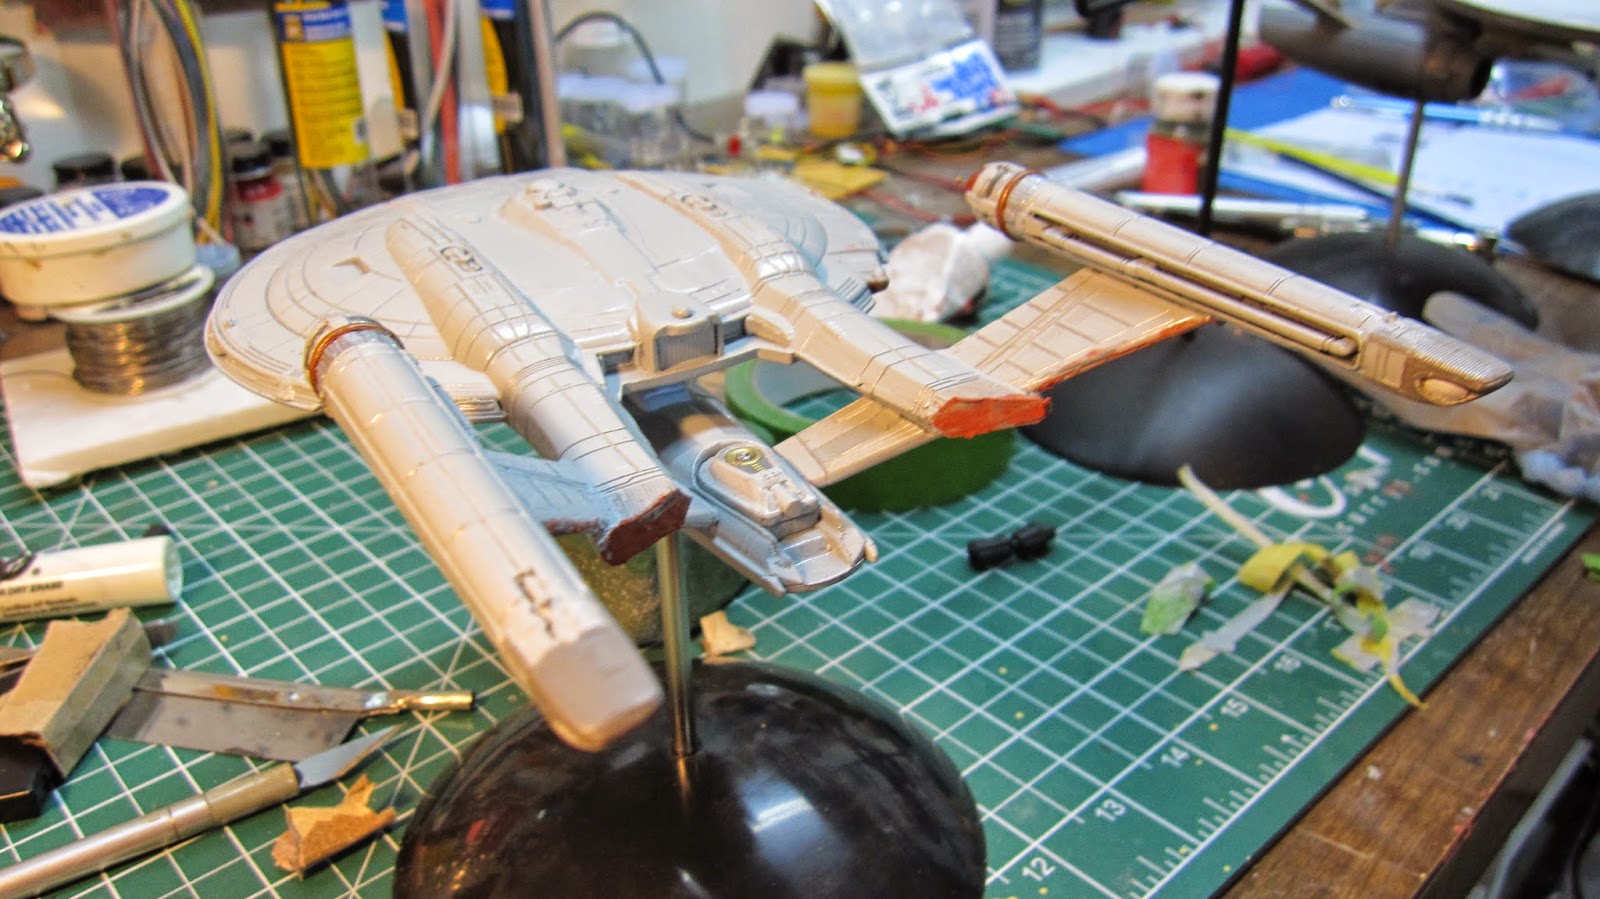
For the new model, I’ve removed the main sections from their sprue
trees and have experimented in assembly methods to visualize how I will build
this in which order with the wiring and lighting I need to do.
USS
Brattain NCC-21166
So this is a redress of the USS Reliant from Star Trek
2. The studio model got reused many
times as different ships. In Star Trek
IV it was USS Saratoga and a couple of unnamed models in space dock. During Star Trek The Next Generation it got
re-used many times as a ‘science ship’, first time as USS Lantree in the second
season without the ‘roll bar’ weapons package (as the lighting was
malfunctioning). It’s next appearance
was in ‘Night Terrors’ as USS Brattain and the weapons package had a different
paint job (the dark grey sections were now medium blue on the roll bar).
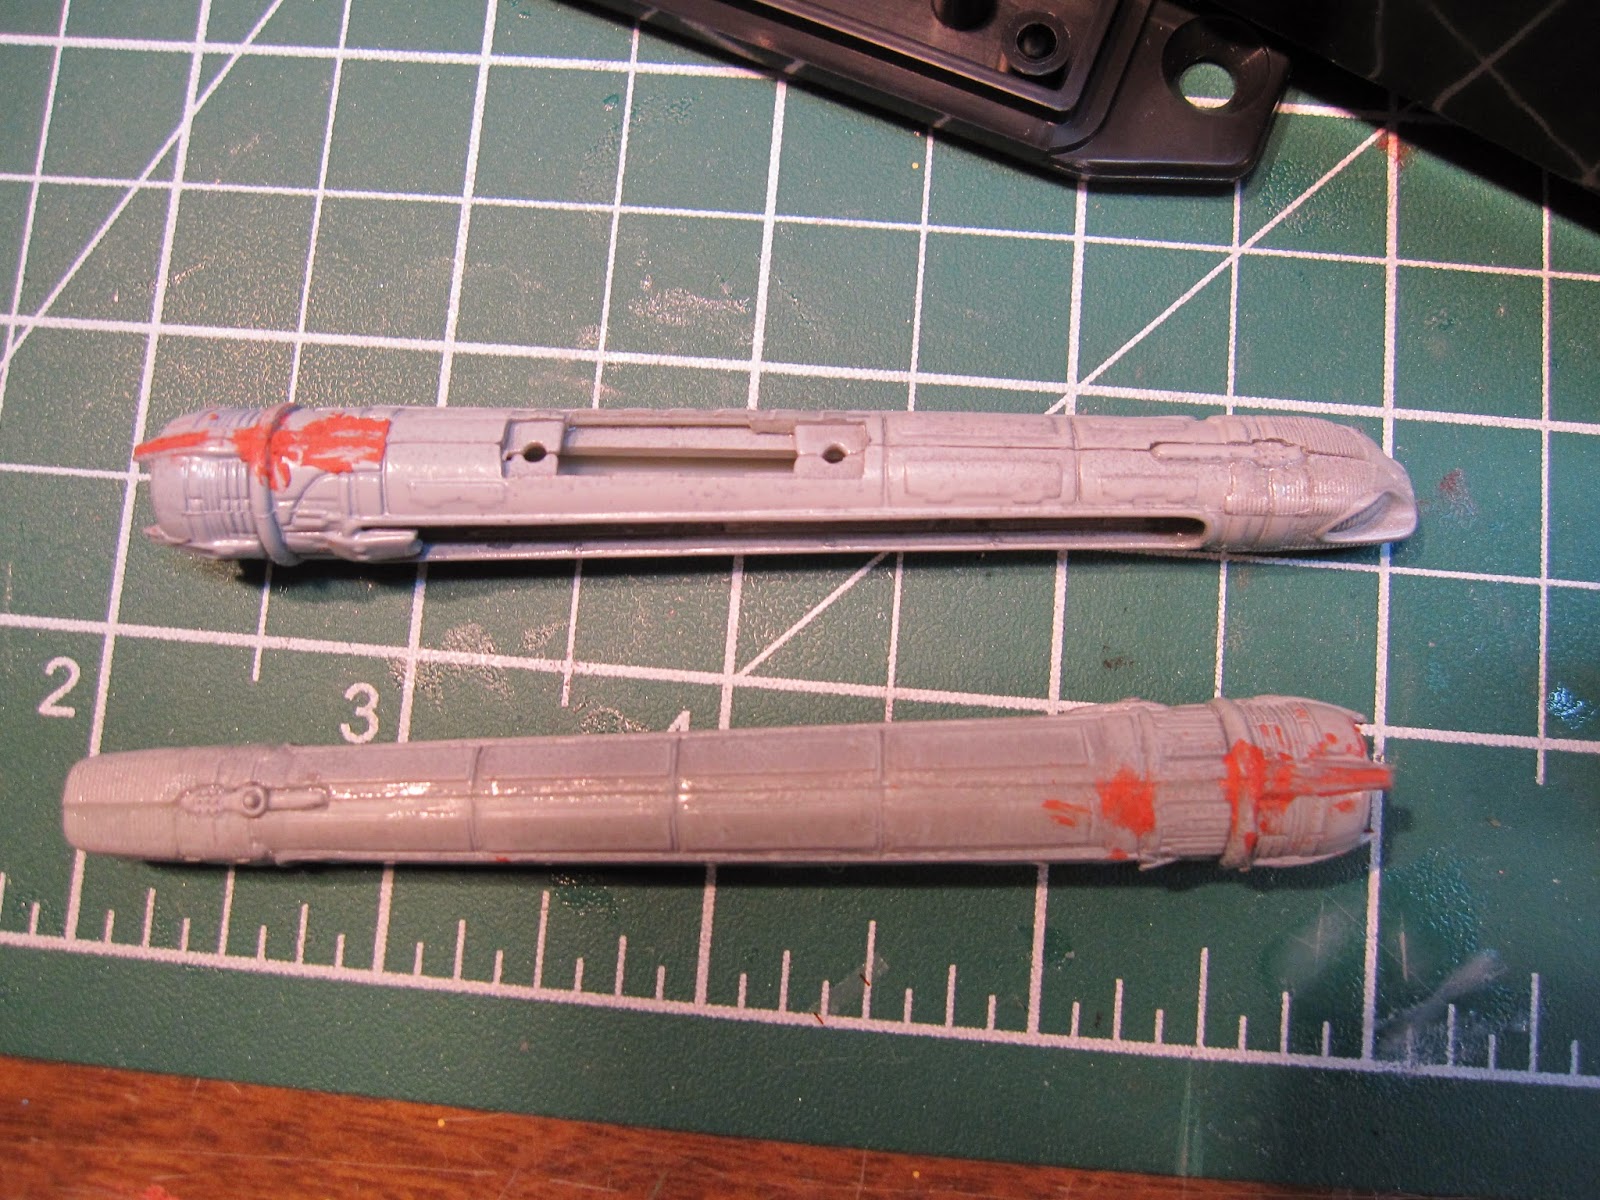
Like the Enterprise model, it is divided into 4 bags (main hull, base, additional parts and clear parts). Part count for this model is 42 (30 styrene white, 8 clear styrene, 3 black styrene, 1 metal rod). The AMT version I believe had 32 parts, and assembled similarly, though where the pylons meet the hull, I prefer this version.
This model comes with a basic decal sheet (for the same
money as the USS Enterprise 1/1000 model with an extensive sheet!) and I would
hardly call the ‘snap together’ technology.
Most of this model falls apart so easily. Snap-together for me will always be ‘glue-together'. As snap-together, you ultimately have to glue it together, so that to me is a fail. But since I only glue models together, there is no issue with me.
COMPARISONS
Once I got both of these models side-by-side, since they are essential 'sister class' ships, utilizing many of the main components, I wanted to ensure the details are similar.
BRATTAIN (Reliant)
ENTERPRISE-A
Brattain's Bridge Dome and Planetary Sensor Dome are on the left, Enterprise's components are on the right.
A comparison of the lower planetary sensor domes (Enterprise is on top, Brattain's is below)
Nacelles on their sprue trees: Enterprise on the left, Brattain on the right.
Enterprise on top, Brattain below.
Here is a full breakdown of the model, ready for washing.
RESEARCH AND AFTERMARKET PARTS
ENTERPRISE-A
Before I bought either model, I bought ‘TMP REFIT PAINT
GUIDE’ by Trek Modeler. It is a
wonderful document which outlines how the Refit was painted and the differences
between the way she appeared in Star Trek The Motion Picture and how she
appeared at the conclusion of Star Trek VI.
I highly recommend any modeler interested in painting a Star Trek model
from this genre purchase this, I did.
When the first Star Trek film was released, the Enterprise
had a beautiful, pearlescent finish which was dulled down over the years. The model kit comes with ‘wallpaper’ decals
to re-create the elaborate paint job.
Round 2 does a great job of it, but I wanted to get a decal sheet which
offers the ‘prismatic’ hull sections, and the ‘Blue’ colour scheme of the
Enterprise –A. After Star Trek III: The
Search for Spock where the Enterprise appears to self destruct, all of the
battle damage had to be removed from the studio model. This meant the ship got repaired (repainted
in some spots), not always matching the original colour. So I picked up Acreation’s decal set.


It basically replaces the kit’s decals with a
few exceptions and makes almost every part a decal. This may have been an impulse buy (as some decals
I could make myself), but it came down to my time vs. experimenting with
decals, which I almost always do anyways – see Columbia Build…My model will
represent this model how she looked at the end of her career minus the ST6
battle damage. The changes are very
subtle, but noticeable to be different to those with a keen eye. I think I will be using a combination of both the kit decals, these decals and paint more details, such as the colours on the pylons. The left over decals are going to be donated to my build I started, but never finished in 2013, USS Intrepid NCC-1631-A. This is supposed to be a hybrid between the Original Star Trek Series and Star Trek The Motion Picture. A TOS model with Aztecs! I've put it on hold as I've been trying to figure out the best way to accomplish this on a budget.
I also bought Paragrafix' brass etch set for this
model.
(the shuttle bay was removed as a practice piece - not to be featured in this build, and the saucer edges have been removed to drill out the windows)
I bought it for masks and details
vs. the inside sections they offer. This
is a new product (brass etch) for me so I’m learning as I go with this. I haven’t yet washed the model but I’ve
started to drill out the holes and this product help for the side walls on the
saucer to make the windows even.
BRATTAIN
And again like the Enterprise-A build, I bought the
Paragrafix Brass Etch set for this model.
I can foresee using this entire set vs. the Enterprise set as these are all external details. I also bought at the same time the
larger set for the AMT Reliant for when I build it.
So I patiently waited for Round 2 to release their detailed
decal sheet, not so different from the sheet which come with 1/1000
Enterprise.


With shipping, I paid close
to double for it compared to the original purchasing price. This is something I’m not impressed with, I
feel this model kit was rushed in it’s release.
The only saving grace is the upgraded decal sheet has all the names and
numbers of all of the screen used Miranda Class (the class which the Reliant
belongs to) ships. That’s a plus to
modelers of all skills. Myself, I generate my own
with Photoshop. The reason why? I have a thing about typography. I have studied design over the years and anyone who might be a nerd to design and typography, check out 'Helvetica' (the documentary, not the font, although a near perfect font...I digress). Something I've already noticed in the kit decals, sometimes there are mis-matching fonts or spacing issues. For Ent-A, I have no choice but to generate my own "NCC-1701-A" as it is not included in the model kit. The new decal sheet seems correct in it's spacing but you have to use the "NCC-" from the simple decal sheet that came with the model, but it's warped, and for Brattain, "NCC-21166" should have a long dash rather than a short dash. Easier to do my own.
I re-engineer decals to
create my own names, numbers, etc. such as USS Farragut, Challenger NX-03, USS
Constellation, etc. and then print to clear, or white decal sheets. Another small, but noticeable detail is Brattain, along with all of the other 5 digit registries should have a TNG styled arrowhead vs. the a TMP (Star Trek The Motion Picture) styled arrowhead on the pendants.
With both of these models, I do see some
custom decals being generated and some areas where I will opt to paint vs. using the decals whole. Also the windows (like the Enterprise kit decals) have the windows (blacked out) in with the wallpaper decals. This means I will have to either cut out the windows or scan this and make my own version (probably easier).
PLANNING
AND PREP
Since I am lighting both of these models, I’ve removed the
bulk of the main parts from their trees so I can plan my assembly with all of
the extras, plus my wiring path. I’ve
also experimented with the order of assembly.
The Enterprise is similar to the TOS ship in the sense the all the
parts modular except for the engineering hull which is comprise of 4 sections
plus front and end caps locking the struts.
Far more robust than the old AMT model which had a very habit of
breaking where the strut meets the hull (fuselage). For the Brattain, the main hull is basically
an oblong ‘saucer’ with the engines connecting to the sides of the main section
and the pod mounting ontop (a bit trickier to light with the thin pylons and how they connect to the main hull).
For me, a large part of studying these models is to assemble them in my workshop, keep them 'taped' together and draw inspiration when it hits me. I bought these models together just before Halloween 2014, so those who follow my posts regularly (I hope), might notice a few other projects which are closer to completion.
Brattain between a TOS Constitution Class and a Refit Constitution
Sister Refit Constitution Class Ships
(L-R Challenger NX-03, USS Intrepid NCC-1631-A, USS Brattain NCC-21166, USS Enterprise NCC-1701-A, USS Excelsior NCC-1718)
ACCURACY TO THE STUDIO MODELS
Comparing these models for accuracy, they are pretty good
with a few exceptions.
ENT-A
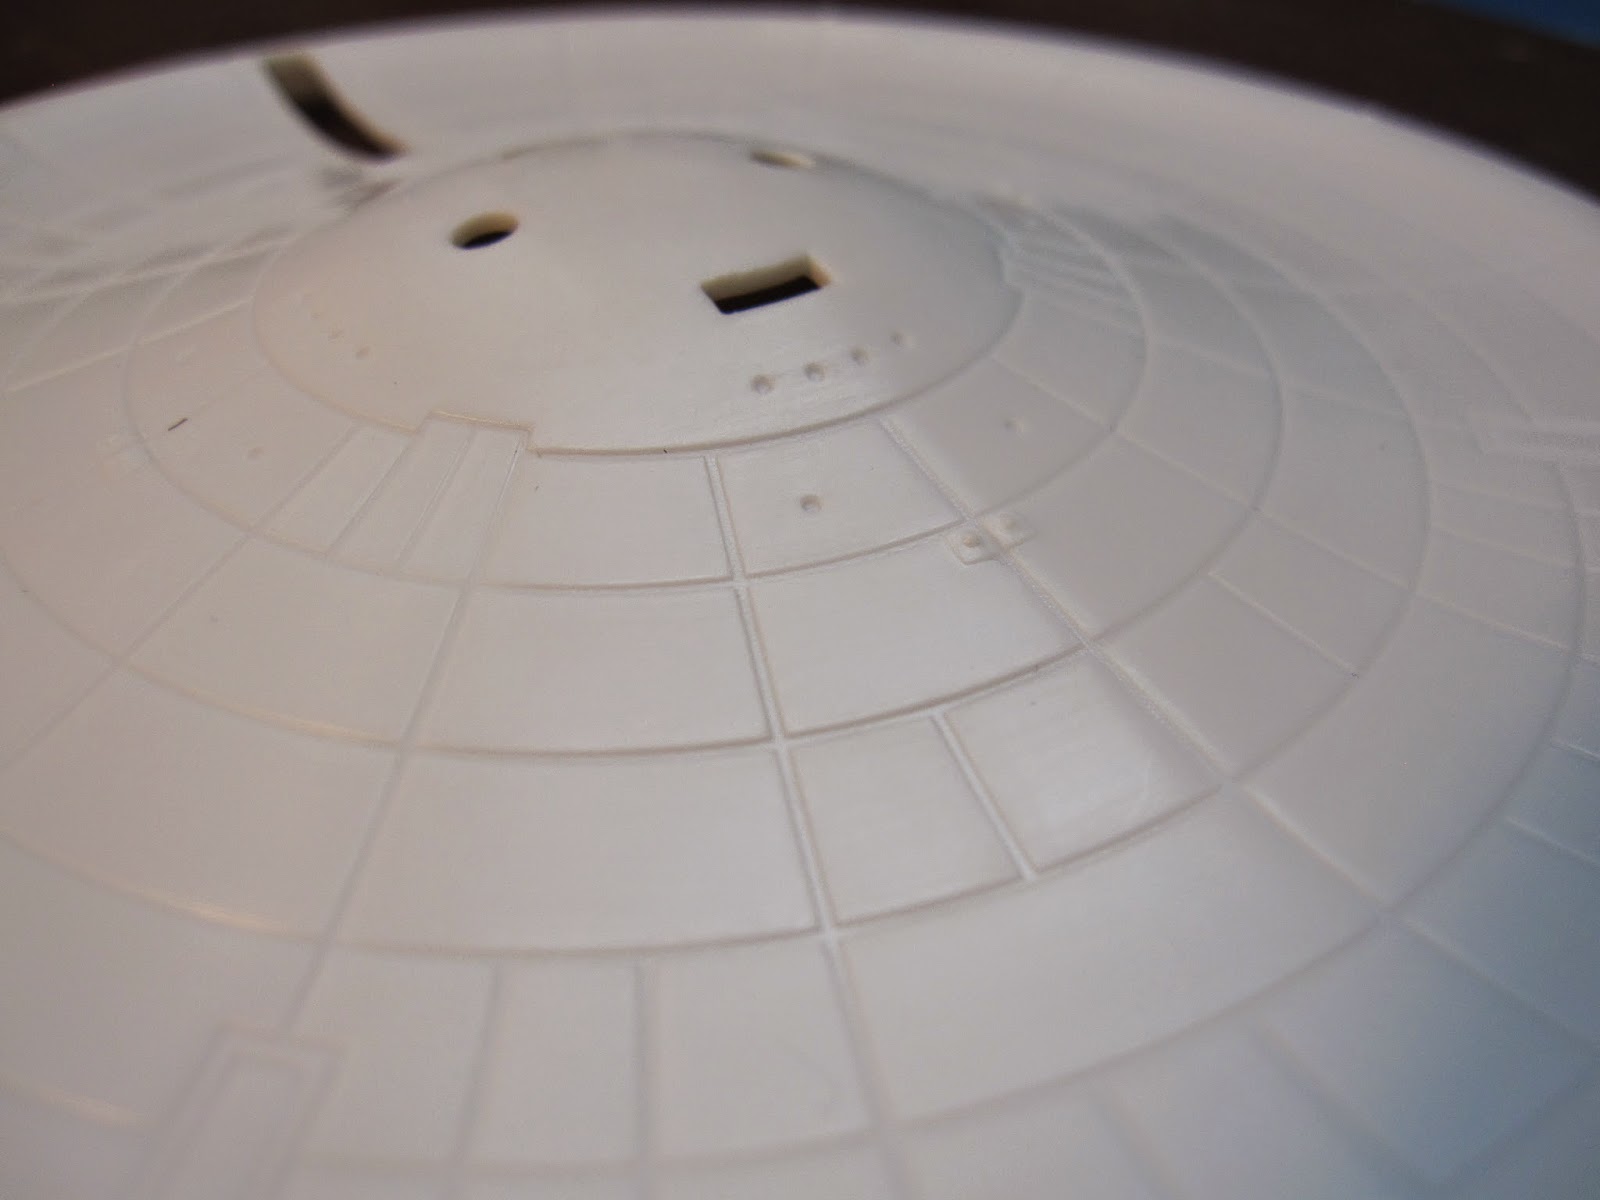
The upper deck of the B/C deck on the top of the saucer
needs some reshaping via sanding.
The Bridge Dome needs to be enlarged by adding additional
material. This could be tricky… There
are three rectangular/parallelogram shapes on either side of the bridge – too
tiny to replicate it by raised plastic at this scale, I will make a decal for
this.
from Star Trek III: The Search For Spock
1/1000 model
1/350 model (correct proportions)
A mistake Polar Lights and AMT have done in the past with
their Refit kits (and Reliant with their kit) is to have a raised area
surrounding the phaser banks. It should be flat to the hull, and the gridline runs through it.
ENTERPRISE
Screen Cap from Star Trek The Motion Picture
1/1000 Round 2
1/537 AMT/Ertl (I hate that faux panel lines!)
1/350 Polar Lights
BRATTAIN
Star Trek The Next Generation: Night Terrors Screen cap
The model makers goofed, and spelled 'Brattain' as 'Brittain'
1/1000 Round 2 Kit
1/537 AMT/Ertl Reliant (original release - how wrong they got the B/C deck!!)
To fix
this I will either have to remove the feature all together and make my own
phasers. On the Brattain, they are in the wrong spot (like the original Refit by Ertl).
1/1000 Enterprise - Correct Phaser Position
1/537 Reliant - Correct Phaser Position
1/1000 Reliant (Brattain) Phasers on wrong side of gridline.
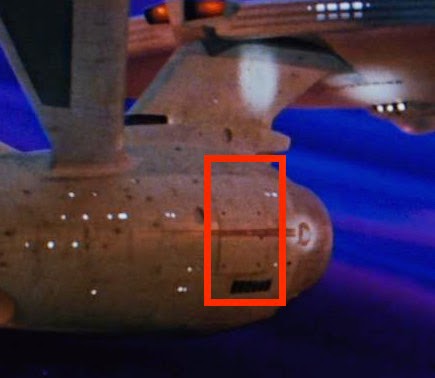
A small but noticeable difference between 1701-Refit and 1701-A, there is a lack of windows on the starboard side of the ship.
from Star Trek II: The Wrath of Khan - USS Enterprise Refit
Notice 5 portholes (darkened)?
from Star Trek IV: The Voyage Home - USS Enterprise-A
Now they're gone!
The reason for this is actually this is 1 of 5 mounting spots on the USS Enterprise. There is a panel on the port side as well (although it's configuration is only 3 port holes). The other mounting points are on the bottom of the hull with 4 phasers and a strobe light, the Deflector and the Shuttlebay.
from Star Trek VI: The Undiscovered County - Enterprise A Port side - bottom rectangle denotes bottom mounting spot.
from Star Trek The Motion Picture - the port holes are barely visible
So, I have moved forward to fill in these port holes (prior to washing the model).
The only time the Enterprise-Refit was shot from it's starboard side undamaged was in Star Trek II: The Wrath of Khan. This is the only other shot of it:
I suspect the windows were painted on, not unlike the original USS Enterprise from the TV Series. I digress, something to take note when I build my 1/350 USS Enterprise Refit.
Lastly, the Reaction Control Thrusters on the saucer are raised – they
should be a painted detail (both models. This is easy
stuff.
Back to Brattain
The B/C deck are also mis-shaped on this model and should be
less thick. This is an easy fix.
(that's the correct shape and size for the bridge!). I'm thinking about switching bridges if it will work.
The Nacelles are carbon copies of the ENT-A Nacelles on with
these models. But there are differences
between these nacelles on the studio model.
On the Brattain (Reliant), the front grills are not as long/tall and the
bottom edge is more rounded. Easy fix.
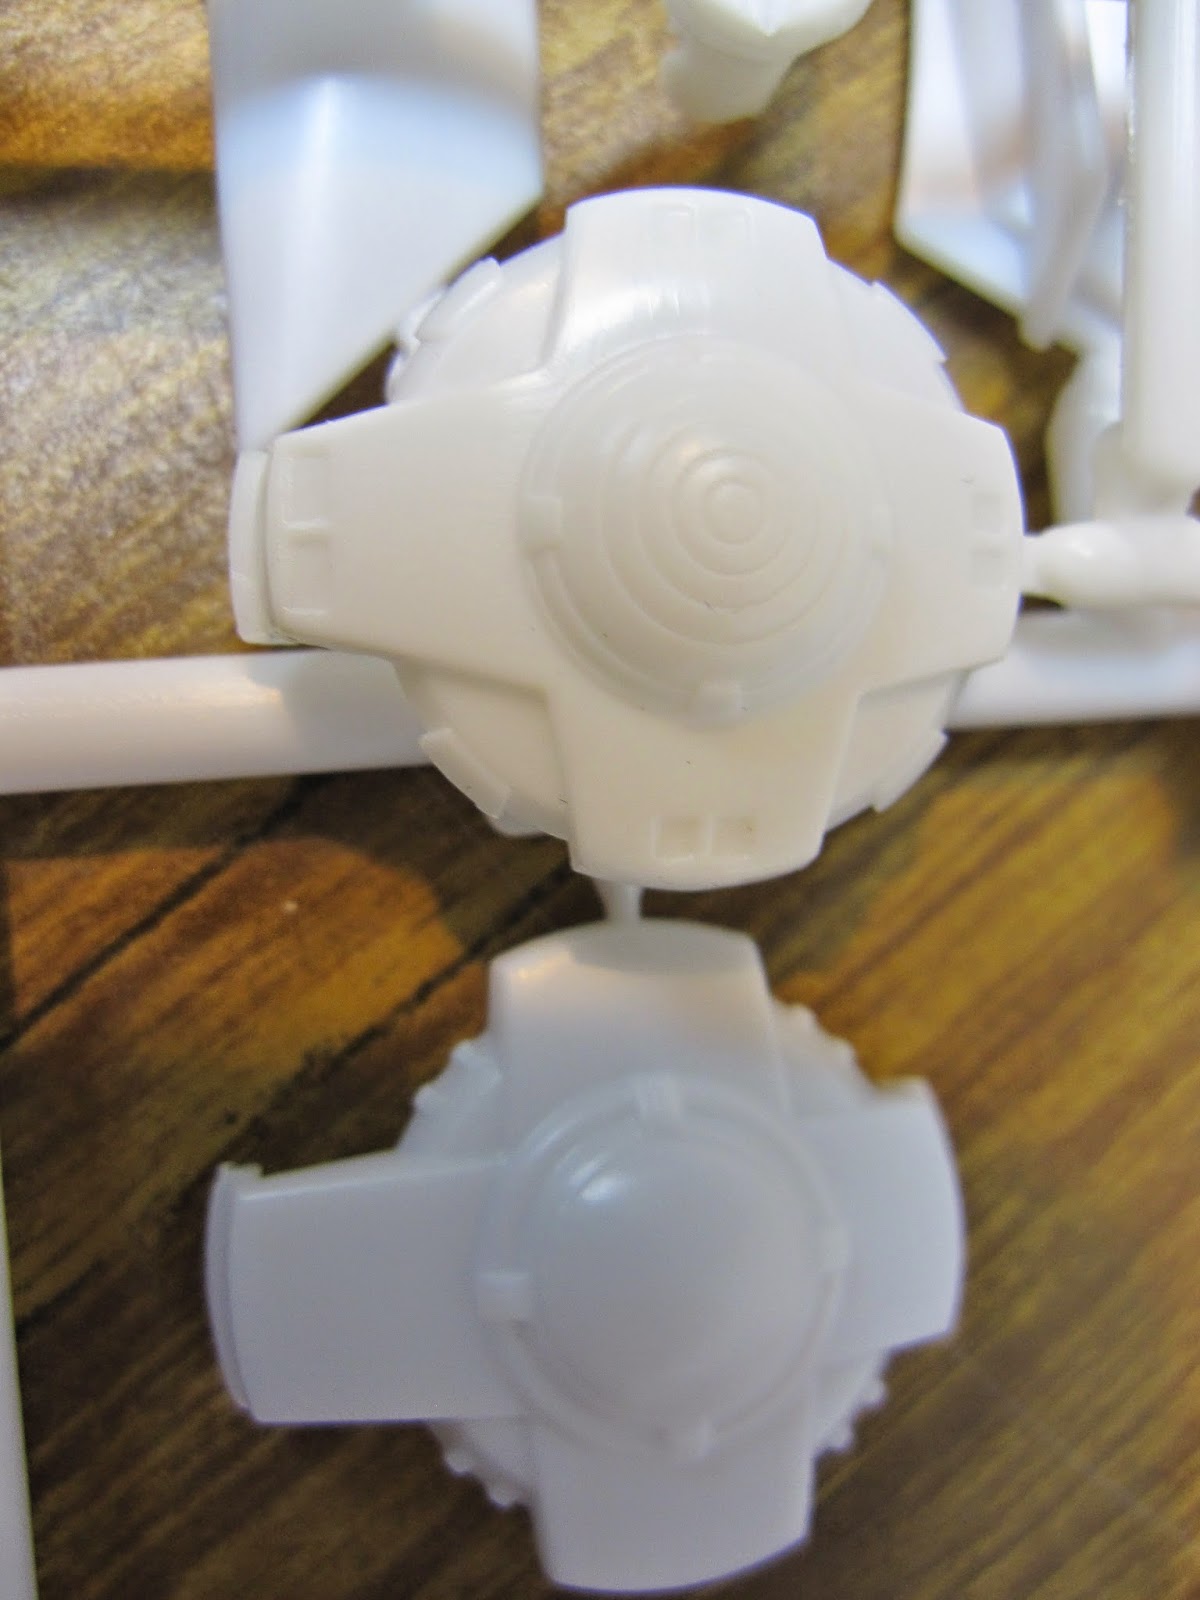
Casting
I’m not 100% sure the Photo Etch Parts for the shuttle bays on
the Brattain will work for this model, or more correctly, since this is my first project using brass etch, I want to have a Plan B. So I created a mold off of the original
part using my trusty Mold Builder compound. It's easy to use as you paint it on in layers, but it does take a long time of making 12 or so coats to get a good mold off of a part.
The studio model has a series of lights in a ‘dash –
dot – dash’ pattern (like the windows on the perimeter of the saucer) around
the bay doors.
The doors on this model
are molded in the same white plastic as the rest of the model.
That
Drilling Feeling…
So you want to light a model with port holes which aren’t
marked? Get ready for lots of hand
drilling. Not a big deal but it can get
very tiring very quickly. I’ve started on the Ent-A.
For the round port holes, I will use fiber
optics to fill them.
FYI - The Fiber Optic Store sells 3 different size strands for $20 US plus shipping...great deal!
The long dashes, I
will fill with resin and mask for painting.
I have bought both clay and Play-Doh to make walls to fill direct the
fill for resin.
PAINT TESTS
I
have aftermarket wall paper decals for both of these models. That said, certain parts need to be painted
and I prefer paint for the most part (wallpaper decals when done well over compound curves despite using Micro Sol, sometimes they don't match or worse yet you have bare spots. For azteks, they are great though! I will be painting a lot my own details on these models as I'm concerned some details tend to look 'cartoonish' at times. One detail I will be painting are the phaser banks on both models. Here I use a 1/537 Ertl Refit as my 'boiler plate'. (Down the road I will be turning this model into a Star Trek Phase II ship so all of this painting will get sanded off.)
I have previously mentioned the
paint-guide from Trek Modeler – I won’t re-publish their work but if I find
anything else noteworthy, I will publish that. The Phaser banks were painted Neutral Gray with a touch of Pale Green and then dusted with a custom yellow mix as mentioned in their guide.
The studio model of the Enterprise has a pearlescent finish (although now currently dulled down), but there are lots of areas of both silver and gold, so here i are my silver spray paint attempts on scrap styrene.
corresponding paints
I then did 2 coats of Tamiya White Pearlescent spray paint on these scraps to see what effect it does to each silver. I know it is a translucent paint. Here are my results:
LIGHTING
These
are my own lighting systems I’ve been designing using some basic electronic theory
(and the help of an app for the iPhone called ‘LEDulator’). I’m using 12V power supply at 1 Amp.
Here's an idea of scale of the LED Ribbon to go in each nacelle.
These are the LED Ribbon blue glow for each warp engine.
I know there are clips you can get for this purpose, but what I do is use a micro drill bit to drill a hole through the contact. Then I thread the wire through, twist it and solder. Note, I'm using blue wire for my hot lead instead of red. Since I have multiple circuits, I'm using different coloured leads to tel them apart.
That's not actually burned from over loading but the heat shrink has been charged by a lighter. I find using my heat gun (which I bought for industrial use) is far too big for these models. I used it once on my old K-7 space station build (still incomplete) and it melted part of the model, even though it was turned off. (Sort of the reason why it's incomplete).
Digital automatic cameras tend to both over expose and seem to shift blue light to purple for some reason. What's amazing is I stuffed the LED ribbon in the nacelles and have yet to cut out the inner grills. This is a pass!
A test of the saucer lighting on the rim windows. This is with the window masks over the opaque white plastic. The standard window pattern around the edge of the saucer (x6 places)
The Rec-Deck windows.
And here is a drilled out section of windows. Passes my test!
And finally the LEDs on a beadboard to test to see how everything will work together (note to self, I will need a larger beadboard in future, I still haven't go every LED on here yet!). The amberish lights are actually warm white LEDs. These will be used for the spots on the nacelles and neck. The rest of the model will be lit with a cooler, brighter white which should approximate the neon system used in the original model.
In this video, you can see the flashing strobes. I'm going for a simple strobe system rather than use the two-tiered flashing which is only sometimes shown in the feature films. This is very easy to do, I use a flashing LED as the control device, then wire in series the LED I want to flash.
With all of the added circuits and wiring, it has become apparent the kit dome base won't be suitable for both of these models. So I picked up a 4 3/4" x 4 3/4" x 2 1/2" project box for each model. I already have an aluminum rod I can use for support.
That about wraps up this entry. It might be a while before the next one as I have cluttered my work bench with LEDs, resistors and other electronics. Suffice to say, I've started this build.
For further reference on these studio models, check out the following links:
Happy model building!!