As last seen in my previous entry on the TESLA retro-build, I finished the 'Stardrive' section. Now moving on to the Saucer Section...
Of all of the canon Federation starships in the Star Trek universe, the Galaxy Class had the largest volume as it was essentially a 'hotel resort' with warp engines, and most of that volume was in the saucer. So there are lots of windows, and lots of lifeboats. This is the easiest part of the model to build but the most monotonous section to detail.
I sanded off the lifeboat hatches as they were uneven, some went through grid lines and the studio model the lifeboats appear virtually flat (on the 6 foot model, the 4 foot model had physical relief). To put back the lifeboats, I decided to make my own decals based off the Round 2 decals included in the clear Enterprise-D release which came out a few years back and since i would be using clear decal sheets for my model, that means I'd have to paint the model tan and mask off the individual squares. No small task.


Also I added detail which is on the 6' model at various points on the losel saucer.


The Azteking...
On Starship Modeler's website, there are many resources one can download, including decals. I decided to use an available download decals for this model as frisket masks (in hindsight, it would have been easier, cheaper and faster to print these on decal film and apply it directly to the model.)


This is a coat of white primer.

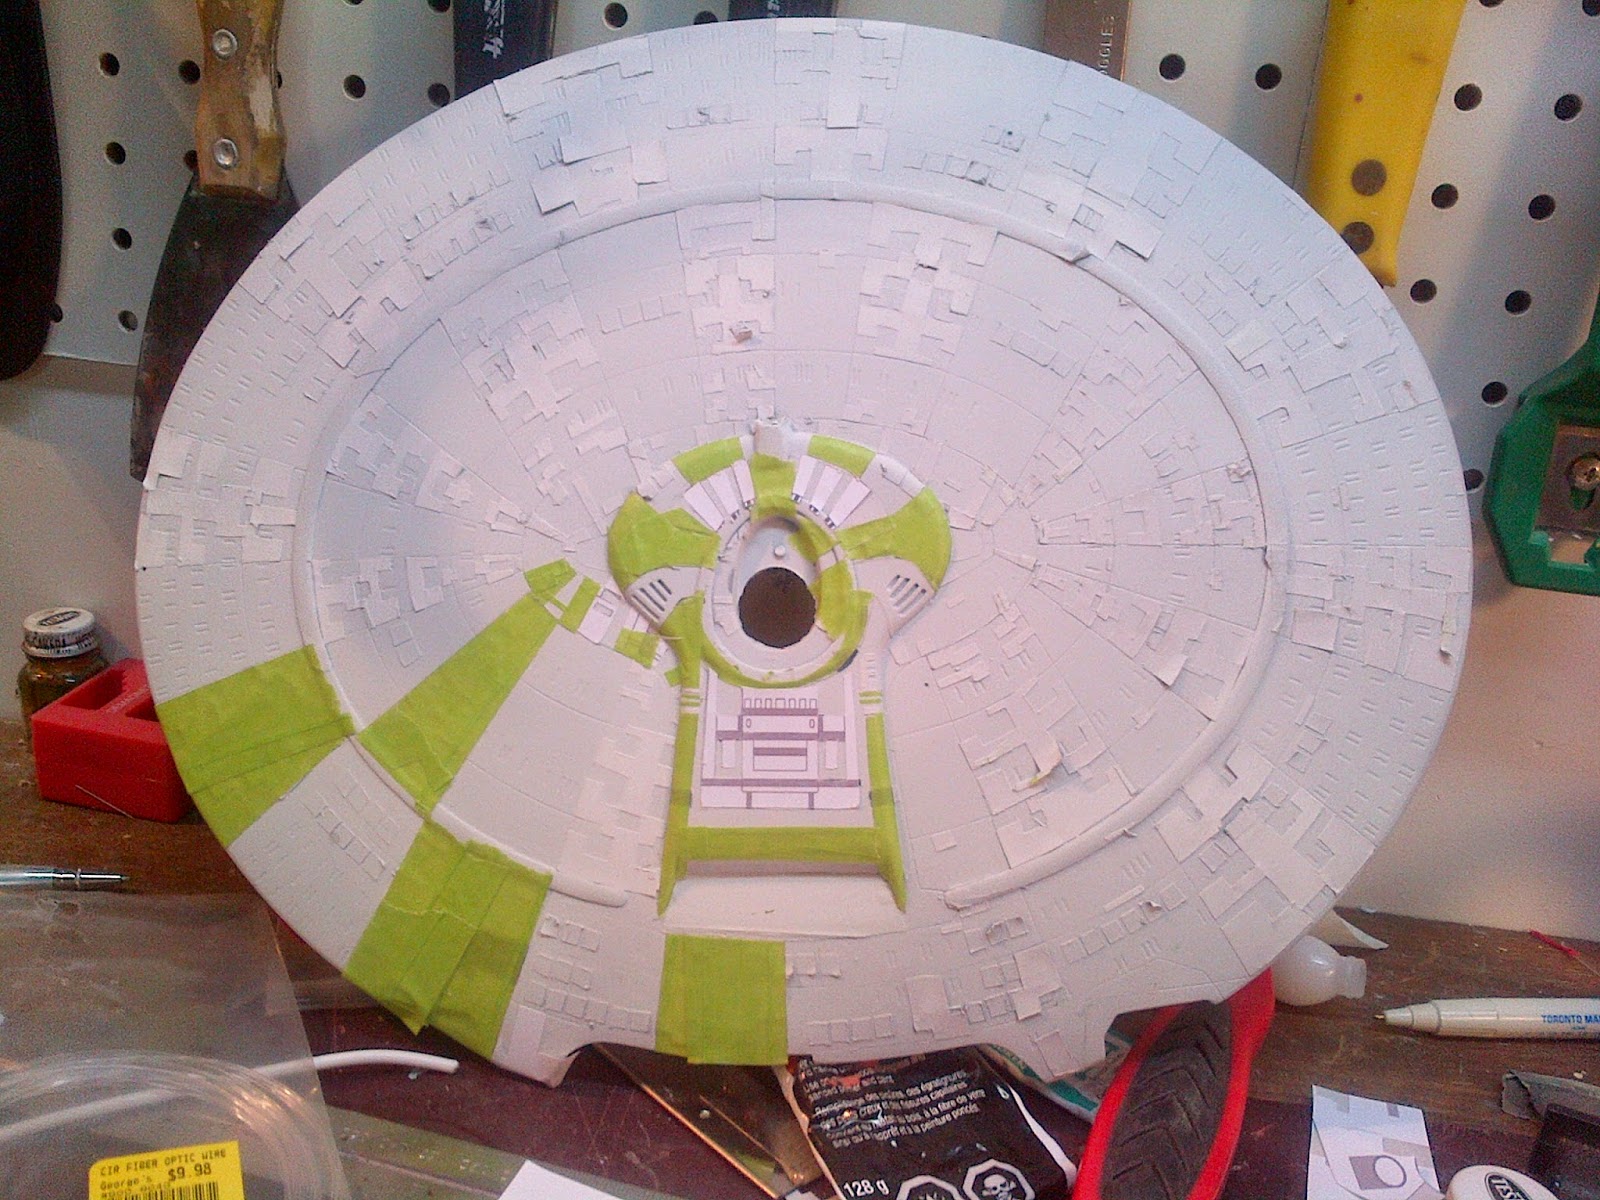
Next layer of masking.


Originally I was going to apply this as a decal but soon realized it would not match so I had to mask these patterns off individually.


Now with the hull panel masking removed...(sort of interesting looking if not circus-like)


And now, the base coat...


painting the life boat hatches first and then masking them gave them a 'stepped' appearance, I kinda like it. For all of the effort, I would either order an extra set from Round 2 next time or find one by the many after-market suppliers. That would also go the same for the Azteks. It will be interesting when I finally get around to building my Enterprise-D.
Here is the lower saucer test mated to the Star Drive (Engineering) Section.

On to the Upper Primary Saucer:
This is the same process as before, for the bridge section, I unfortunately lost the dome (a pattern which I've recently found to be time consuming and expensive when you have a a build lasting over months) so I melted 2 fiber optic strands together to get the approximate shape.


It should be noted that I filled in the scribed line where the 5-bank lifeboats intersect the gridline and then re-scribed it after it was masked off...FYI.


Here is the whole model temporarily sitting together, the upper hull unmasked.

What I didn't chronicle are all of the touch ups where tape pulled paint. Since I used aerosol spay cans to paint the model, I would spray a small amount on a surface like vinyl or something the pain wouldn't adhere to and use cotton swabs and brushes to touch up the sections. Very effective.
So this is where I will be leaving this 'retro update' for now. It's sort of funny, it was almost exactly a year ago I finished this model. Oh well, I hope you are all enjoying this build. Cheers and Happy Model Building!
Hi! I'm in the early stages of building a Galaxy myself and have gotten a couple of ideas from reading about your build. I like your idea of using an armature to strengthen the model. It also looks far sturdier than the plastic stand the kit comes with, so I want to make a similar armature for my model; could you please tell me more about making one?
ReplyDeleteHi Norman, I built the armature out of a lamp rod which bought from either Home Depot or Lowes as well as a coupler, and a section of 1" x 1/8" piece of flat aluminium. Essentially I cut a very large hole in the lower saucer where the battle head meets the saucer to allow the rod to pass through. I bent the rod on a vise in 2 spots which I hot glued to the neck. The trick to this is a lot of patience and double checking alignment. The 1" aluminum I used as armature to attach to the rear of the lower engineering hull. I do agree the stand the model comes with is very light weight and I found in the past, the two engineering hulls will separate over time if one relies on just the stand and glue to hold it together. The problem is the centre or gravity should be further forward, like right in front of the deflector. That would look strange for a Star Trek model. Here's a link to my entry where I built the armature. http://fordosmodels.blogspot.ca/2014/06/retro-build-amtertl-galaxy-class-tesla_2.html. I hope this helps. Cheers!
DeleteYes it does, thank you very much. I have read through all of the entries on this project, I was just looking for more detailed information. Would you be able to give me some measurements from the second armature you built? I'd like to know how long and how tall it is. Thanks again and have a nice day.
DeleteI updated this blog entry ( http://fordosmodels.blogspot.ca/2014/06/retro-build-amtertl-galaxy-class-tesla_2.html ) with more details on the 2nd armature with new pictures I took last night, including measurements. I hope this helps you with your build. And thank you for your interest, if you have any other questions or comments, please feel free to send them to me either on this blog or PM me via my youtube channel (which is not a modelling one) ThisIs40Films. Cheers!
DeleteThe information you've added will be of great help, thanks!
DeleteThis comment has been removed by the author.
ReplyDelete