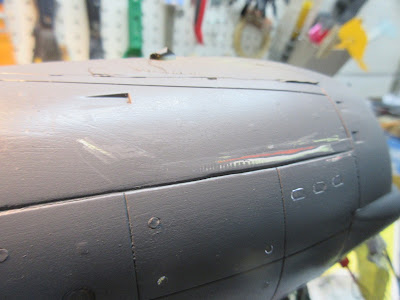
So this entry comes up as a follow-up to the last one on the Secondary Hull. Light leaks have been my biggest obstacle with this build. The window masks I got for this model have been a 'godsend'. It is virtually impossible to build this model without utilizing them and it creates more work in the end to do what I did, and not use them initially.
Onto the build!!
...'Just like starting over'...John Lennon
That summarized what I need to do painting wise to complete this build. But before I needed to do this, I had to check the wiring...
 |
| sorting out the wires |
What you are seeing here was my biggest fear...something isn't working. In fact, because I had all my wires as separate leads vs. making mains for each circuit, some wires got damaged when they were taped up, as the model sat for months. Each entry isn't always exactly order of how I've worked on this as I keep switching back and forth between the saucer and engineering section. I had to add a new strip of LEDs to illuminate the starboard windows.
This is a better view of what I had to do - the camera tends to overexpose things.
I used a pencil to hot glue the LED strip.
Taming the wires...I colour coded each circuit for easy identification. Once I got them all sorted, I soldered everything into one wire, per colour.
A little light on the subject...
Once I got the wiring set, I turned on all of the lights, fixed seams and looked for more light leaks.
 |
| in the lower half of the ship, you can see a band of glowing plastic |
The shuttle bay still is lit correctly. There is a gap between the red windows (control deck, in universe) and the rest of the ceiling. I filled it in with Black Tulip Fabric Paint. You can pick it up at Walmart in the hobby section.
The aft bulkhead which houses the frame for the doors and fantail had many light leaks, not to mention, a very bad seam. That was filled with red putty (Bondo Glazing Compound).
Also, the undercut of the fantail had light leaks too, not to mention uneven paint job.
Applying the window masks
I used my #11 X-Acto knife to individually apply each mask to the windows.
The masking set did not have accurate botanical gardens masks, so I jut used frog tape and cut to shape. The key with frog tape (which is a bit stickier that Tamiya tape I find) is you have to burnish it with your fingernail to avoid getting overspray under the edges.
Ready for grey primer...again.
Here is my first new grey coat of primer.
Still some light leaks.
Some refining of the surface of the hull. I had a chemical reaction last time which created a bumpy surface on the hull previously, so this had to be fixed.
I also notice there were dimples on fantail too, red putty to the rescue!
I had to re-scribe the area around the spine of the engineering hull, many times. The problem is there is a natural seam along the slanted gridline, connecting to the spine and it bleeds light in a big way!
Also after all of my fixing of the grid lines, I had to further refine them...
In the end, black Tulip paint has been a godsend to fill the offending gridlines.
That wraps up this chapter of this model...
It may not seem exciting, but this is so crucial to make sure this looks like a replica, not a cheap toy.
Happy model building!!
Star Trek and all related marks, logos and characters are solely owned by CBS Studios Inc. This fan blog (production) is not endorsed by, sponsored by, nor affiliated with CBS, Paramount Pictures, or any other Star Trek franchise, and is a non-commercial fan-made blog intended for recreational use. No commercial exhibition or distribution is permitted. No alleged independent rights will be asserted against CBS or Paramount Pictures.


No comments:
Post a Comment