It's been a long while...longer than I expected. Life is amazing! Work is amazing! Model building has taken a backseat, and that's ok, it is a hobby after all. That said, I'm still plugging away at my 1/350 build which has a name now, "USS Olympia". A 24th century Constitution Class Starship.
This entry isn't so much a build update but a retro review of a kit, one that came out 30 years ago and something I feel ties into the current Star Trek 50th Anniversary and the new Star Trek film, Star Trek Beyond.
A hobby shop I frequent recently had its 30th anniversary and many specials on all of their kits. I found a 'Holy Grail', a vintage 1986-87 AMT/Ertl 1:537 scale USS Enterprise NCC-1701-A from Star Trek IV: The Voyage Home. I couldn't resist it, I bought it!
 |
| Star Trek IV: The Voyage Home was released theatrically on November 19, 1986. |
Side box art
 |
| 'Authentic decals for 1986' |

 |
| screen shot on the Enterprise-A bridge at the end of Star Trek IV - I always wished this was used in Star Trek V and beyond, but the reality is it was heavily modified for Star Trek The Next Generation as the Battle Bridge. |
There were seven editions of these Refit Enterprise kits, each from the first six movies and a 'Light And Sound' Edition which was released between Star Trek V and Star Trek VI. In each edition there were subtle changes, except from 'The Motion Picture' 'to 'The Wrath of Khan', where the surface of the hull changed from month to this awful random hull plating which is grossly inaccurate and remained in every release of this kit since. I was privileged to once own a 'smoothie'. The smoothie kit also didn't have 'phaser bumps' or any detail on the photon torpedo launcher (which is not terribly detailed in the later versions).
Out of the box

The original decal sheet.


The overall condition of the kit is really good.
Decals
First the decals. This is a very simple decal sheet as what standard at the time. There's no pinstriping, (other than the Starfleet Pendant which is inaccurate).
 |
| Star Trek IV decal sheet on left, Star Trek III on right |
 |
| Star Trek VI & Star Trek V(used) on left, Polar Ligthts 1/350 on right |
Overall, the registry is really good on such an old decal sheet. Here I compare Star Trek IV vs. Star Trek III sheets.

 |
| Star Trek IV - Enterprise-A |
 |
| Star Trek III - Enterprise-Refit |
Other than the registry (NCC-1701 vs. NCC-1701-A), the rest of the decals are the same, reworked. In this case, the same illegible marking for the docking port (sigh).
 |
| Star Trek IV |
 |
| Star Trek III |
And of course the Star Trek 20th anniversary commemoration decal...still hard to believe that was 30 years ago...

Differences between the kits
The major difference is stand.
 |
| old stand on the left, new one on the right |
The change in the stand meant a change in secondary hull:
 |
| Star Trek III on left, Star Trek IV on right |
 |
| Star Trek III on top, Star Trek IV below |
Here is a composite of both the old and newer hull together. The slot on the old hull was for a switch. The original STTMP smoothie version of the kit had a lighting system, which only lit up the saucer windows, bridge and sensor array at the bottom of the saucer. No blinking lights, secondary hull lighting at all, and the secondary hull was the battery compartment, much like the original Star Trek AMT model released in the 1960's. This new mounting system allows the ship to be removed from its stand unlike its predecessor where it had to be glued on.
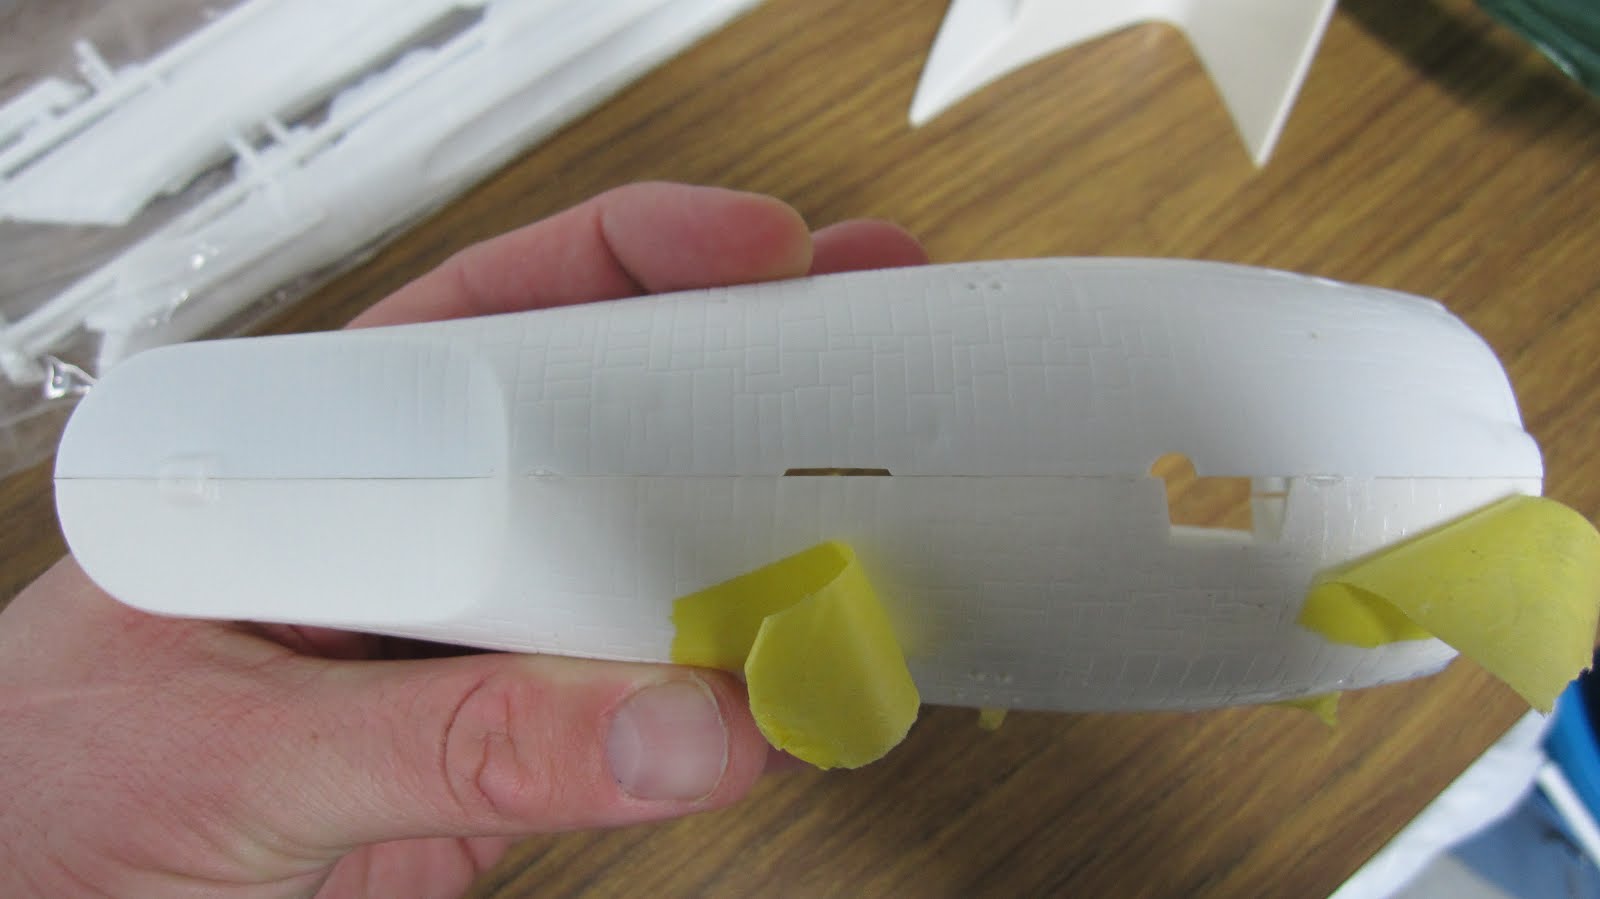

This kit was still factory sealed when I bought it, as were the parts. The only deterioration was the mold release and the plastic yellowoing. I have three of these kit currently and this is the most yellow sadly.


Conclusion
Granted, these models are horribly inaccurate to the 8' studio model of the Refit USS Enterprise. That said, it is 100% bang on accurate to the 2' model used in Star Trek II, Star Trek III and Star Trek VI because, ILM built one of these models, lit it up and used it for the far away shots. So, Trek model builders, you can say you can build a 1:1 studio build of the 2' model of the USS Enterprise-Refit or -A. And that's my plan with one of these models, build an accurate, if not crude studio accurate recreation of what was used on screen in long shots.
It does sadden me that Round 2 has decided not to re-release this model kit (along with many other models like the Klingon V'orcha Battlecruiser from Star Trek The Next Generation or the Runabout from Deep Space Nine). Some of the reasons I've heard were, there's too much wrong with this kit. I do agree on some levels, but they recently re-released (thank goodness) the USS Excelsior. The mold was permanently changed when AMT/Ertl made their Enterprise-B kit over 20 years ago, changing the molds forever. Round 2 built a new set of replacement molds for the new Excelsior. I'm convinced if there is a will, there is a way.
For those who may come across this model in hobby shops, or online, buy it if you want a piece of history. If you want a 95% accurate model of the refitted USS Enterprise (-A), buy the big kit, which I'm still working on, or get the smaller 1/1000 kit which is an awesome model! I've built one of them so far, building a second and looking to get a few more for kitbashing.
Dummies Guide to Fixing the Ertl kit
First fill in all of the panel lines...not at all accurate and the detail is soft, while preserving the gridlines and hatches. Options include using a high fill primer and sanding. I did this as a kid with rough sandpaper, and moving up to very fine sandpaper. It's not impossible, it just requires some work.
The ship is missing a 'landing pad on the lower saucer', re-scribe it.
The windows on the saucer rim are off. Drill out a new window, and fill in the old one. Also the aft section windows are not drilled out at all, which include the Rec Deck.
Consider purchasing aftermarket parts like the set Don's Light and Magic offer. Great work! (I'm not affiliated with DLM, but I've used his products before and I think they're fantastic). Also consider upgrading the decals, and geting a masking set to create the Aztek Effect on the hull.
Consider kit-bashing a set of Reliant Nacelles with Enterprise Nacelles. The reason why, is the grills should be slanted, like they are on the Reliant, but aren't done on this kit. The front on both nacelles aren't accurate at all. That said, I have when I was a kid, I filled in the front ends to a similar shape to the 8' studio model.
In consideration, this makes a good sized model.
Happy model building!
Star Trek and all related marks, logos and characters are solely owned by CBS Studios Inc. This fan blog (production) is not endorsed by, sponsored by, nor affiliated with CBS, Paramount Pictures, or any other Star Trek franchise, and is a non-commercial fan-made blog intended for recreational use. No commercial exhibition or distribution is permitted. No alleged independent rights will be asserted against CBS or Paramount Pictures.
No comments:
Post a Comment